
Accelerating Map Compiles in Quake-Based Engines
(February 18, 2018)
Every map made for a Quake-based game has to go through a process known as compiling, where the level geometry is simplified, lighting is calculated, and important run-time optimizations are made to speed up rendering when the map is run. Depending on level complexity, geometry, and certain other factors, compiling can take wildly varying amounts of time. (John Carmack estimated the levels in Quake would take about two-and-a-half hours to fully process on a Pentium 90, and it's not unheard of for levels to take days or even weeks for a full compile on slower machines.)
There's tricks you can use to speed up your compiles, both while you're building the level and the final compile before you publish a map. Establishing good practices will keep those times down well into the future.
(This guide won't make a whole lot of sense if you're not familiar with the compile process. While this guide is specific to Source, much of it applies to Quake and GoldSrc as well, especially if you're using upgraded compilers.)
Where compiles slow down
Each step of the compile phase has its own pitfalls and places to hit snags. With the BSP and CSG stages, running out of memory is the issue most likely to cause headaches, but it should never take that long on its own. If you'd simply like to get a map in the engine quickly, only the BSP and CSG steps need to run. There won't be any lighting or visibility information, so you'll never want to ship a map in that state, but the option is available for testing.
The VIS stage depends on the complexity of the geometry and the amount of visleaves that can see into one another. The VIS tool has to test the visibility between each and every visleaf in a level. For smaller and simpler areas, this isn't much of an issue. In a large space full of complex geometry to split visleaves, however, the process takes exponentially longer.
The LIGHT or RAD stage generally depends on lightmap scale, or how sharp the lightmaps for each brush face are set to be. The sharper the lightmap, the more samples that need to be taken of the lights around it, and the longer the calculations will take. The same happens when you compile with the -extra, -extra4, or -final flags; the LIGHT or RAD tool takes double or even four times the amount of samples and averages them, creating smoother shadows.
For these reasons, VIS and RAD optimization will be your primary focuses when trying to shorten your compiles.

VIS optimization
Optimizing your level for VIS will bring about faster compiles and maps that run better on all sorts of hardware.
Optimizing wide-open areas
Probably the most important thing about VIS optimization is that no engine that uses the visleaf system will be able to handle large spaces very well. Any visleaf that has a clear line-of-sight to any other visleaf will be tested with one another at compile time, leading to long compiles and a decreased ability to control the amount of geometry being rendered at once. Source implements areaportals and occluders to further cull rendered geometry, but it can't be relied upon. Overly large areas must be kept simple or avoided outright.
Still, if you do have a large, open area and you're mapping for modern Source titles, you can use the func_viscluster entity to tell the VIS tool that every visleaf within its volume can see one another. This forms one larger pseudoleaf that helps to speed compiles.
Optimizing skyboxes
Going hand-in-hand with the concept of large, open sections of the level are large, open areas of the skybox, and believe it or not, Valve themselves are guilty of this:

There is no reason for your skyboxes to be this large. You will slow down your compiles dramatically, and the map will run worse as a result. Avoid huge stretches of skybox that the player will never see, and make the skybox brushes conform to the shape of the level. If you're looking to create sprawling expanses, make a 3D skybox to project around your level instead.
Optimizing overly-detailed geometry
Overly-detailed geometry also has the potential to create an unnecessary amount of visleaves. Because of the way the portal file is created, where each surface of a brush creates the boundary of a visleaf, a brush with eight sides creates eight different visleaves. For a void-facing or world-sealing brush, this is unavoidable. For a free-standing brush, such as a pillar or decoration, this is easily fixable with the use of a func_detail or func_wall entity.
func_detail is an internal brush entity that causes the brush to be skipped when the BSP stage creates the portal file for the VIS stage. In short, the brush will be ignored by VIS altogether. If a brush is mere decoration and doesn't block the player's view significantly, it should be tied to func_detail. (The Source and Quake II map compilers have support for this entity built in. Quake and GoldSrc mappers can get this functionality by using upgraded compilers, such as ericw-tools or VHLT, respectively.)
For a real-world example of an area that can be optimized in this manner, take a look at Quake's start map, and specifically, the Episode Three hallway:

Right: The hallway with detail brushes
Unoptimized, this map takes sixteen seconds to compile for VIS. That might not sound very long, but imagine if you were doing iterative compiles and had to sit through sixteen seconds for the VIS stage alone every time you wanted to see your map in-game. Imagine if it took longer.
Simplifying just this hallway down takes two seconds off our compile time. If the entire start map were to be fully optimized, it would take under a second to VIS. Note that we haven't changed the geometry itself at all; we've simply tied the trims and details to func_detail entities.

RAD/LIGHT optimization
RAD optimization has more to do with the resulting file size than it does how the map runs, but it is still important nonetheless. The main point of optimization has to do with lightmap scale.
Lightmap scale refers the number of grid units per luxel (lumen pixel). The lower this number, the sharper the lightmap will appear. Think of it in terms of ratios: If your lightmap scale is set to 16, as it is normally set by default in Hammer's default game configurations, that's 16 units for every one luxel, resulting in a decently sharp lightmap.

Lightmap scale matters because lower ones require more samples to be taken at compile (which takes increasingly long the more samples that need to be taken) and will increase the map size, but will result in sharper shadows. The smaller they are, the faster the map will compile and the smaller the resulting BSP file will be, but the blurrier the shadows will be.
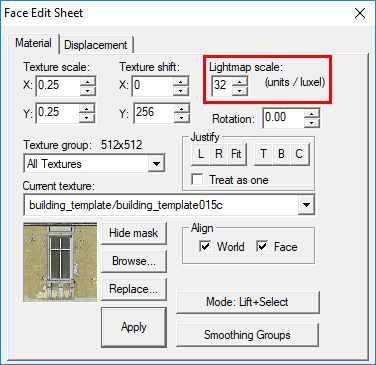
If you need the extra resolution for, say, dramatic, detailed shadows, you can change the resolution per brush face with the "Lightmap scale:" option in Hammer's Face Edit dialog. (Unfortunately, Quake and GoldSrc mappers have far more limited control over their lightmap scales. Lightmap scales in these engines are tied to the texture scale, and the lower the texture scale, the more polys will be used to draw the face.)

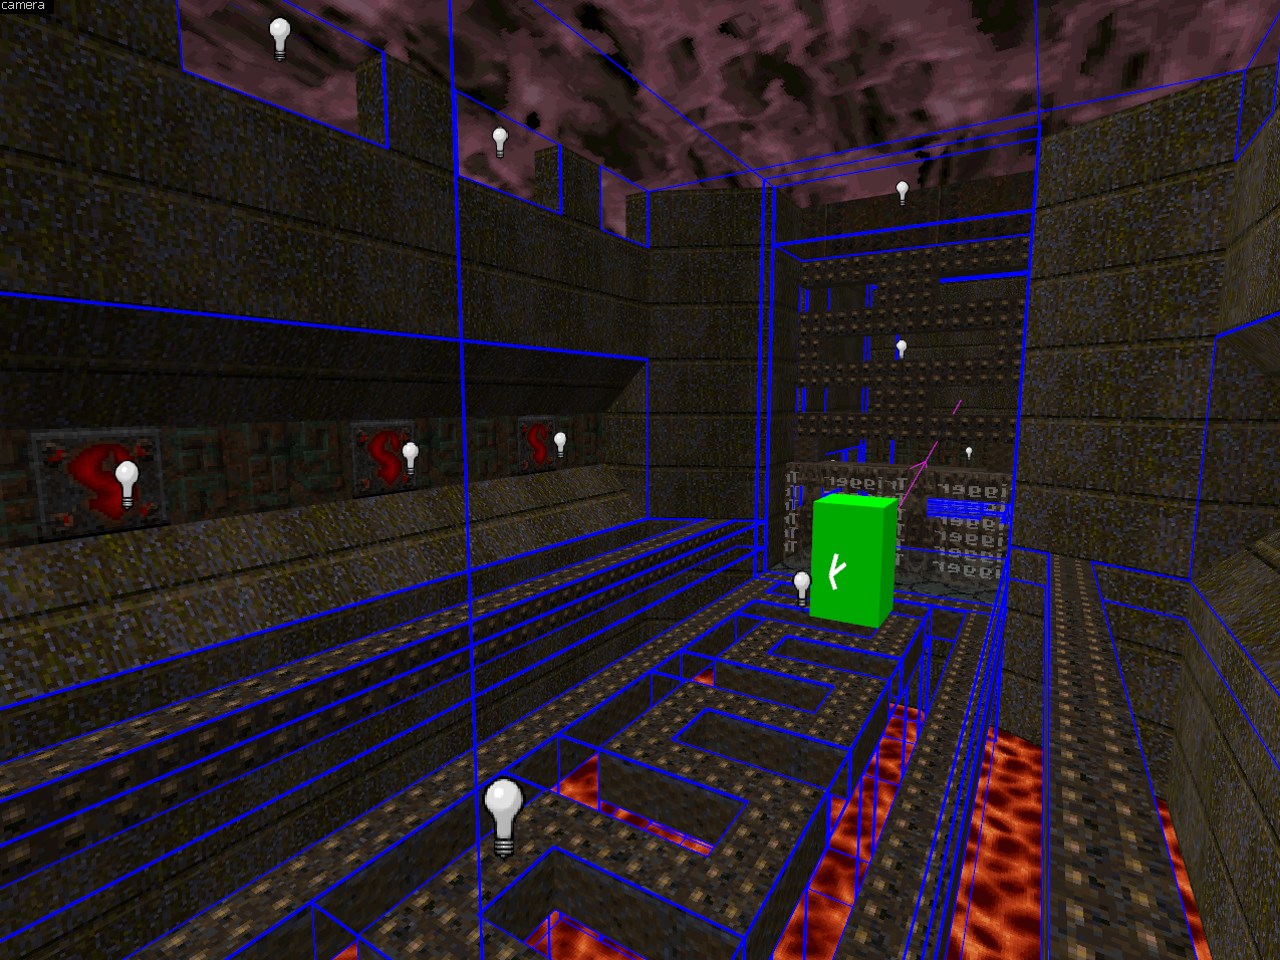
Easy visualization of lightmap scales can be done in the 3D Lightmap Grid view, selectable by clicking the "Camera" at the top left of any 3D viewports you have open and selecting it from the dropdown. The textures will be replaced with grids of various sizes; the larger the grid, the larger the lightmap scale. The right-click texture application function will now apply exclusively to lightmap scales and not textures.
It's best to set your default lightmap scale to 32 (Tools > "Options..." > "Default lightmap scale:") and work with that, decreasing the scale if sharper shadows on a specific face are required. 32 will also look more realistic and better simulate penumbras (the outer edges of the shadow) for general illumination of an area.

Better yet, you can set it so a lightmap won't compile on a face to begin with using the tools/toolsnodraw texture. Any face you apply this texture to will appear invisible, usually appearing as the skybox. It will still block bullets, split visleaves, and seal the map, but a texture and lightmap won't be compiled for its face. This is why Valve often recommends texturing any faces the player cannot see with tools/toolsnodraw, as it'll speed the compile slightly and bring down the map size.
Ultimately, good optimization separates a good mapper from a professional one. Learn these tricks and make them a habit; it'll serve you well into the future.