
Anatomy of a Ricochet Level
(October 6, 2017)
One thing to remember about making Ricochet levels is that, despite jumping being central to the game, players can't jump on their own. Instead, they have to use special jump arrows to hop between platforms. If you'd like to make custom Ricochet levels, the information below will teach you how to create the items and effects normally seen in one.
Basic information
- WADs used:
ricochet.wadand all WADs available to the base Half-Life game - Skybox(es) used: "Disc"
- Player spawn entities:
info_player_deathmatch, but without oneinfo_player_start, players will spawn in midair - Special brush entities used:
trigger_jump,trigger_fall,trigger_discreturn - Special point entities used:
item_powerup - FGD: Download
Layout
The platforms in a Ricochet level are laid out in a mostly symmetrical fashion. Bouncer walls should block the most obvious and direct of shots and encourage the rebound shots that net players more points. This view of rc_deathmatch shows the way a Valve map is constructed. Note the way the arrows are positioned on the top level; these help to focus the action towards the center of the playfield, as do the four outside platforms on the bottom level.

rc_deathmatch, one of Ricochet's pack-in mapsThe far walls of the playfield are usually textured with sky.
Lighting
Ricochet levels are lit from below with a single light_environment entity. It's best to leave the light monochrome, or else platforms and other entities may have strange hues and tones to their faces.
Entities of a Ricochet level
Pad
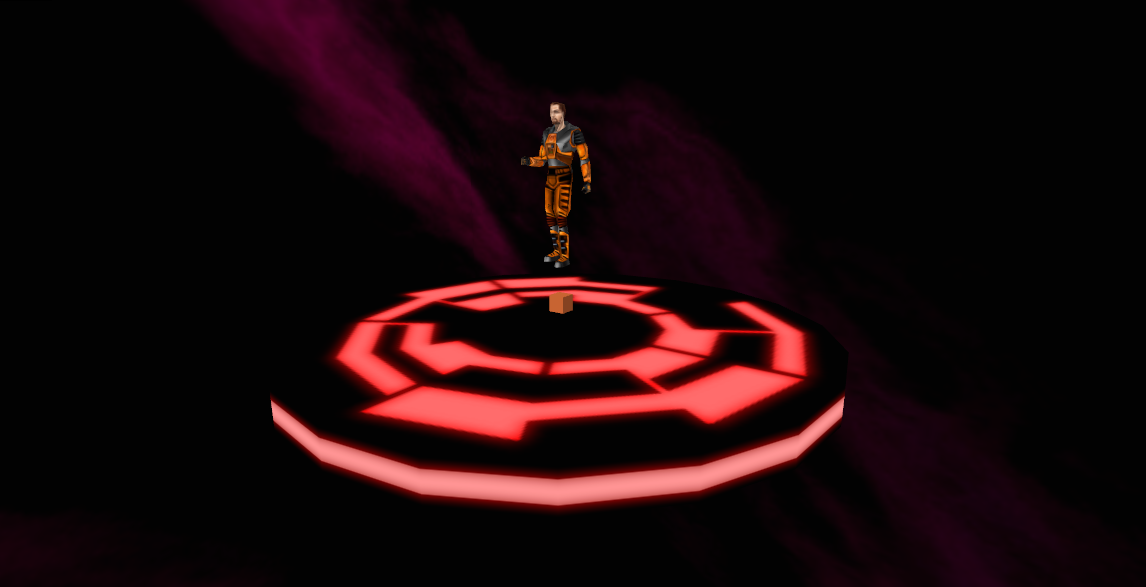
A pad in a Ricochet level is a 256x256x16 cylindrical brush with 20 faces. There are three face textures per color, and the colors don't mix. You should make one side of your arena blue pads, using one of the disc_blue textures for the faces and trim_blue for the sides, and make the other side red pads, with disc_red and trim_red. Pads in the center of a level should be the dual color, disc_dual1. The opposite corners of the dual pad should be textured with both of the trims, red in the northwest and southeast corners and blue in the northeast and southwest corners.
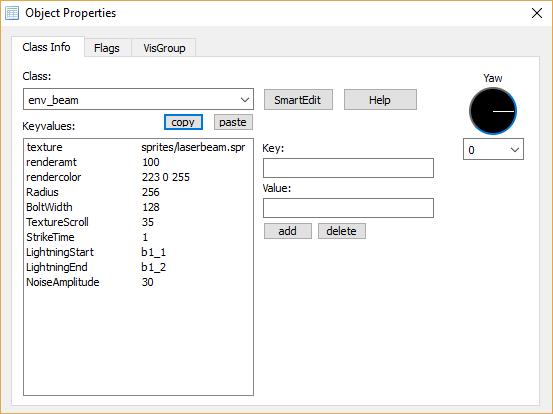
rc_arena has beams underneath the pads. To create this effect, place two info_target entities (one directly under the pad, the other 384 units underneath it, and both centered in the middle), name them, and create an env_beam entity nearby with the following parameters.

Set "Start On" and "Shade End" for the spawnflags of the env_beam.
The pad won't work until you give it an info_target that'll act as the target for the jump arrow pointing in its direction. Center the info_target eight units above the pad and name it.
Jump arrow
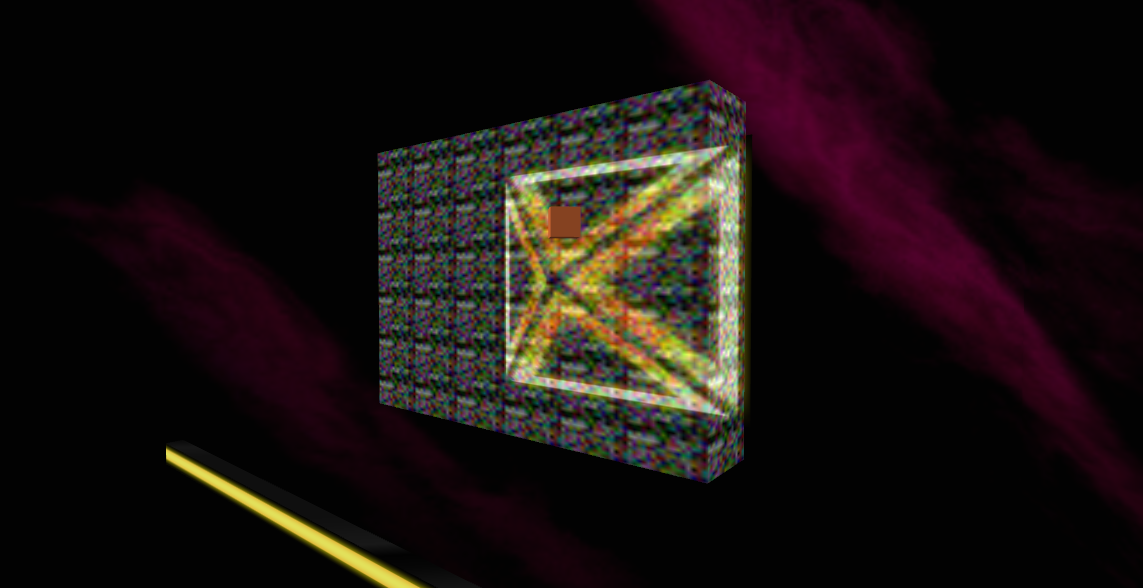
A jump arrow should be 80x36x16 and seamless with the top and side of the pad. The pad should be split between two vertices and an 80x36x16 block created at the split. Use the clipping and vertex manipulation tools to shape it into an arrow, and make sure the top is flat. To texture it, use +0square1 on the sides, fit to the size of the face, and use +0arrow1 on the top and bottom, rotated the same direction as the arrow itself and fitted to the size of the face. For jump arrows on odd, uneven angles, you may want to copy over an existing arrow and rotate and vertex manipulate it into position. Remember to fit the textures to the face again.
The trigger_jump brush entity is what gives the jump arrow its functionality. Place a small one over the arrow and set its target to the info_target of the pad the jump arrow is pointing to. The distance between the platforms will usually be 128, though not always, especially if the player is jumping up a level.
Jump pad
A jump pad is different from a jump arrow as it's not connected to any other geometry. A jump pad is necessary if the player is to make a series of complex jumps in order to get to, say, another pad on a higher level. They are 112x96x32, 96 units above the platforms on their level, and use the same texture as the jump arrows, +0arrow1. Along with a trigger_jump, pads should also have an info_target, as players have to jump into the arrow in order to use it.
trigger_jump and an info_targetBouncer
The bouncer walls are important, as ricochet kills are how players score big points in the game. The length of the bouncer can be as long as you want, but they're 16 units tall and eight thick. Place them 32 units above the pads on that level. Texture the horizontal sides with trim_yellow1, but set the Y scale to 0.5. The top and bottom should be textured with strip1a, with its Y scale set to 7.5.

Bouncer walls also have a trigger_push on top of them to prevent players from standing on them. Copy the bouncer upwards and texture it like a trigger, and then tie it to a trigger_push with its push speed set to 0.
Rotate them both between 10-45°. The textures will break if you don't have texture lock on, so make sure that it is.
Teleporter
Teleporters are the most complex entity in Ricochet to construct. Aside from the frame, textured with strip1a and with no less than four 8x8x8 diagonal brushes connecting the four-unit-thick and eight-unit-apart top and bottom to bouncers on both sides of the teleporter, they have two env_beam entities, each with two separate info_target entities, not to mention the trigger_teleport volume that envelopes the frame. Confused? A visual should help.

Each teleporter should also have an info_teleport_destination entity, which is where the discs will exit from. A separate teleporter is needed as an exit, though in this configuration, both can be used interchangably. If you want to put a teleporter in your level, it's a good idea to create two bouncers along with it and rotate them all at once.
The beams should be configured as such:
Set their "Start On" spawnflag.
Miscellaneous entities
trigger_fall
The trigger_fall brush entity kills any players that enter its volume. Its height doesn't matter, but make sure it spans the entire playfield and is about 200 units under the lowest platforms. Players don't take fall damage, so if they can get around the trigger_fall, they'll fall to the bottom of the map and be left out of the action for the rest of the game.
trigger_discreturn
Around the accessible bounds of the level, create a few trigger brushes and tie trigger_discreturn to them. When a disc enters its volume, it'll be made usable again by the player who threw it. Discs bounce off sky brushes, meaning players would have discs bouncing off of the void and returning to them, ruining the effect of an endless playfield.
item_powerup
The powerup can be placed anywhere along the course of a player's jump, preferrably near the top of the map. One of the four available powerups will be chosen at random, and they'll change at respawn. One entity is more than sufficient for most maps, though if yours is especially big, you can place two. Don't make them too easy to get.
These are the makings of a Ricochet level, though there's much room to get creative. Ricochet levels can use any of the textures and models available to Half-Life, meaning they can be added in and used to add further visual interest and variety to gameplay. (Half-Life monsters, NPCs, and weapons, on the other hand, aren't available.) Just remember that players can't jump, nor can they sprint, so large, sprawling designs are ill-advised.