
Deathmatch Deconstructed: Bounce
(June 19, 2018)

Bounce is very much the polar opposite of Stalkyard. It's a wide-open, rocky arena at sunrise based off of the helipad area from "Black Mesa Inbound", the first chapter of Half-Life. The arena is split into halves using a concrete wall, and three bounce pads (like the ones seen in "Surface Tension") allow access to the second level, on ledges. Two looping tunnel routes sit on opposite sides of the arena, and additional gadgets and weaponry lie within these tunnels.
Bounce is a very large and open map, and this is its primary strength and weakness. Despite this, 1v1 matches are still played on Bounce, and it continues to be a fan favorite.
Layout and flow
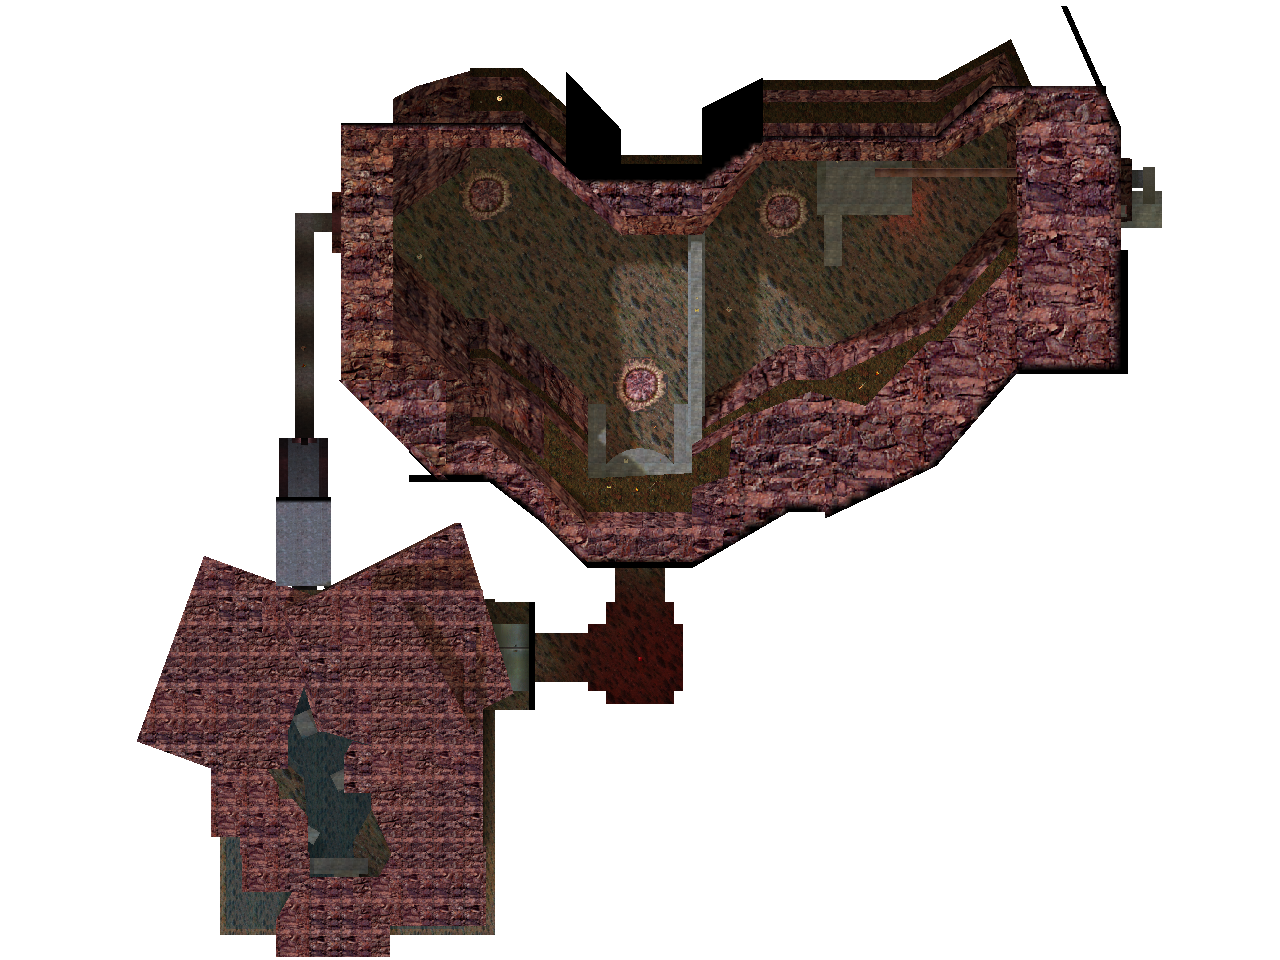
Bounce is easily the most open of the Valve-created deathmatch maps. Players tend to congregate in four main areas of the arena: the rocky nook to the east (with the rocket launcher), the rocky nook to the west (leading out from the flooded cavern), the "announcer box" to the north, and the top level perch point to the south. The east and west nooks lead into flooded tunnel areas, and these are the only loops to be found in Bounce.
All of these areas can see into each other, and there's not much cover outside of the two tunnel areas. Players need to keep moving, no matter how good of a position they have, and Bounce is very conductive to such free movement.

Height is a crucial component of Bounce. The arena is split into thirds vertically, and bounce pads allow access to these upper levels. (These also give the level its name.) Players who know how to Tau-jump have a clear advantage on Bounce, as two well-placed shots allow split-second access to the top of the map or a clean shot to the other side. Comparatively, less experienced players are sitting ducks. In fact, one of the criticisms that can be leveled at Bounce is that it's too big, inspiring many a killbox-style map.
Bounce's arena is split using a concrete divider extending out from the "announcer box", though this only goes up to the second level of the map and is fairly arbitrary. The only way to get atop it is to use the second level or higher. This divider is essentially an admission that Bounce is too large for its own good, and really only serves to visually break the lowest level of the arena down into two halves.
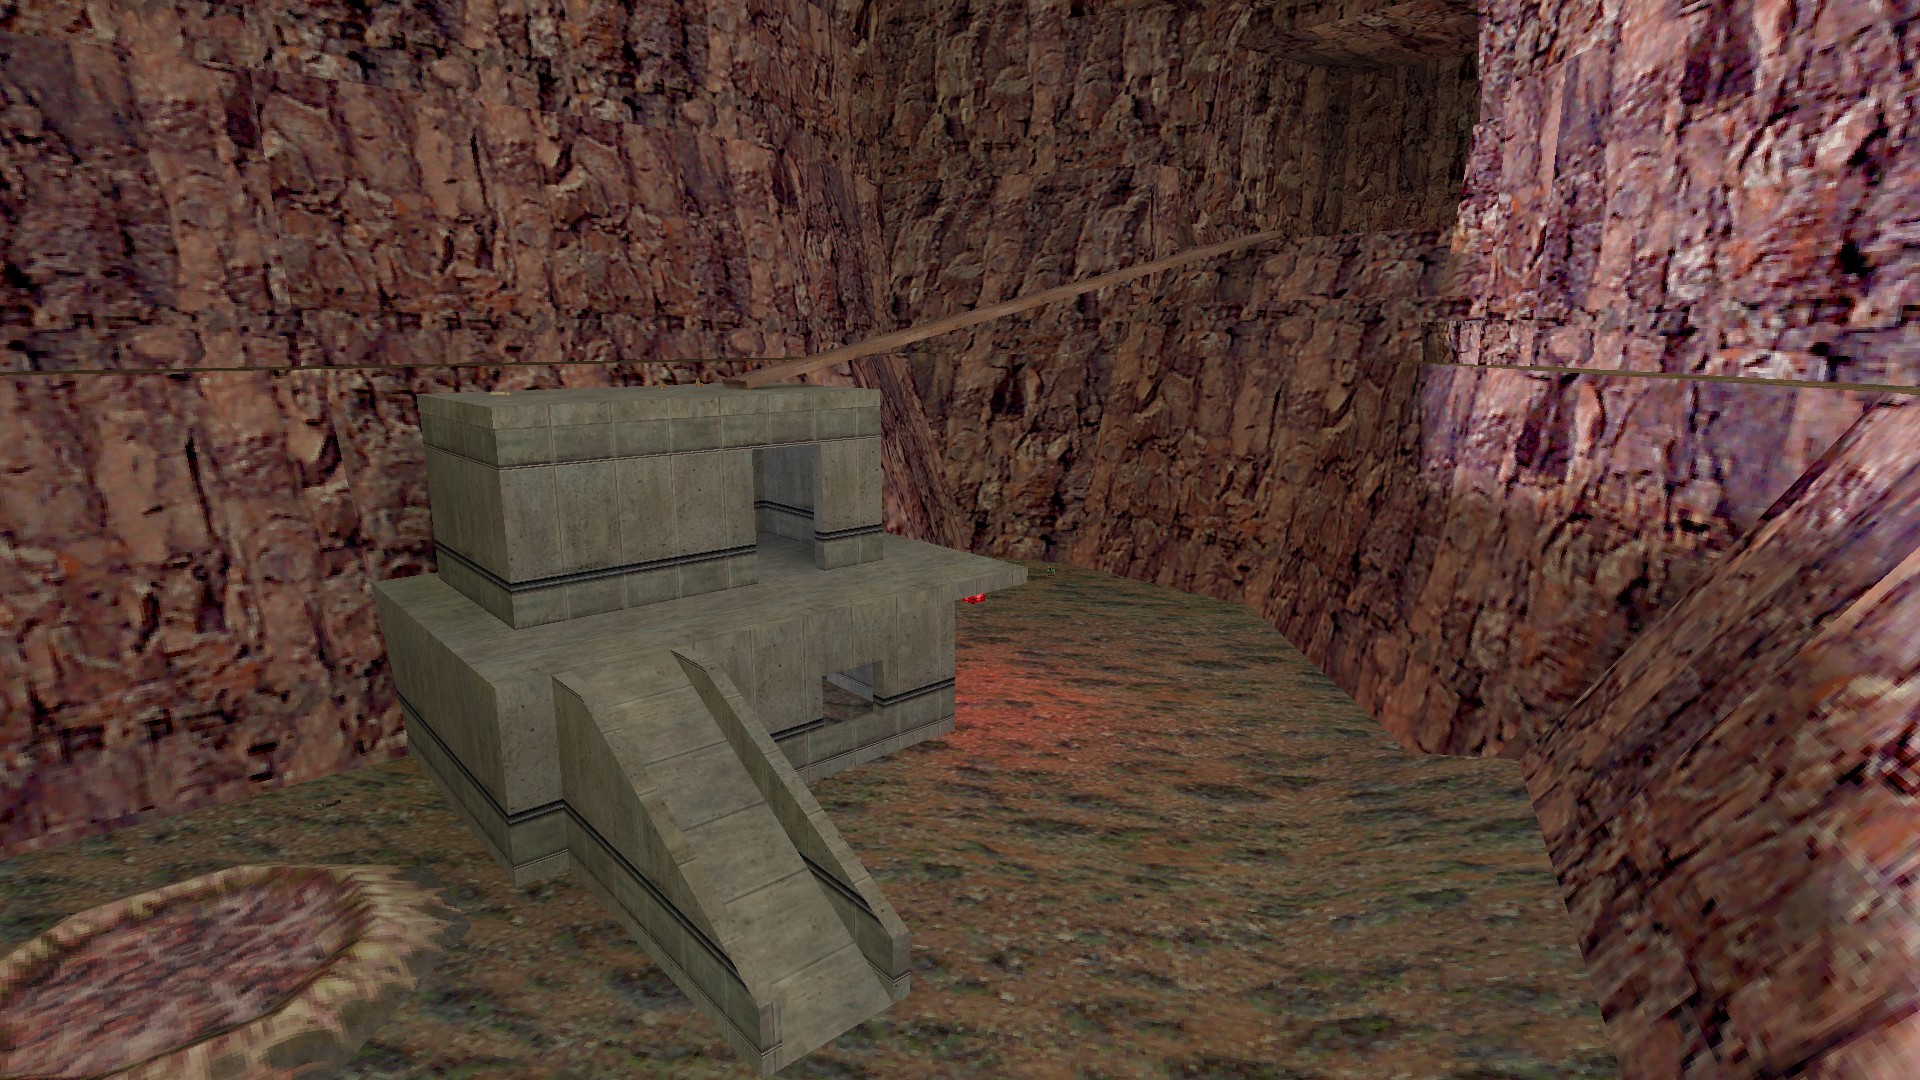

Right: Tunnel under eastern structure
The eastern side of the arena houses a concrete structure that acts as one of Bounce's few areas of cover. This structure leads down into a watery tunnel not much taller than the player, which hides ammo and weaponry underneath the water's surface. Enterprising players can and often do hide tripmines in this area, which are hard to remove thanks to how tight it is. This tunnel leads up into the rocky nook to the east, where the map's sole rocket launcher can be found. A long, wooden board stretching from the nook to the top of the concrete structure completes the loop.


Right: Ladder back to main area
The concrete tunnel under the perch point leads to the western of Bounce. Aside from being its own platforming challenge, this area contains the Long Jump Module, another important tool in navigating the map. The hivehand is largely useless at long range, and is thus useless on Bounce. This tunnel leads to the eastern nook and back out into the rest of the arena.
Weapons and items
Bounce focuses mainly on high-powered explosive and energy weapons, with both the Tau and Gluon Cannon available towards the eastern side of the arena. Depleted uranium ammo for these weapons is also common. Thanks to its aid in movement throughout the map, the Tau Cannon is much more desireable. Bullet weapons are much less common, with the most common being the shotgun. The perch point features a crossbow to aid in sniping.
Health is plentiful, often being placed in twos on ledges and in different sections of the map. Suit batteries are less so, though still relatively common.
Secrets and notable traits
Naturally, as a "Surface Tension"-style cavern map, the cracked and rocky brushwork offers ample hiding spots for snipers, as well as ample places to get stuck. Creative players can bury themselves in the corner of a piece of brushwork, blending in and raining fire on those below them.

The concrete structures of the map are bathed in the urgent glow of red lighting. This is a good contrast to the monochrome lighting of the open air areas of the map, and they subconsciously help to keep the player moving.