
Intro to Source Mapping: Creating Entities
(Unreleased, slated for October 27, 2017)
If you've made it this far, you likely have a room that looks something like this:
This, of course, is not a proper level. It wouldn't even technically work right, thanks to its lack of entities. Entities are everything to a level; the blood to cover the walls, if you will, and sometimes literally. Entities define the enemies players will fight, the lights above their heads, where they'll spawn, and so on. Placing them is quite easy.

Placing point entities

The tool for placing down point entities is called the Entity tool. Switch to it and turn your attention towards the New Objects toolbar at the top of the screen. This box has other functions, but when the Entity tool is selected, it's used to select the type of point entity you'd like to place. You'll notice two dropdown menus, Categories and . For now, we'll only be using the Objects dropdown.

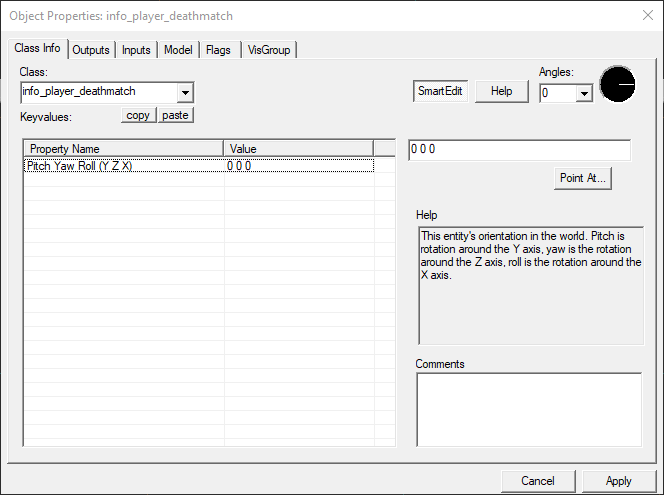
Depending on the game you're mapping for, something like info_player_start, info_player_deathmatch, or info_player_terrorist will be the default entity. These entities all define where the player will appear when he spawns, or enters the game world. To place it, click on the ground in the 3D viewport where you'd like the player to spawn. Most likely, a rather digital looking version of Gordon Freeman will appear.
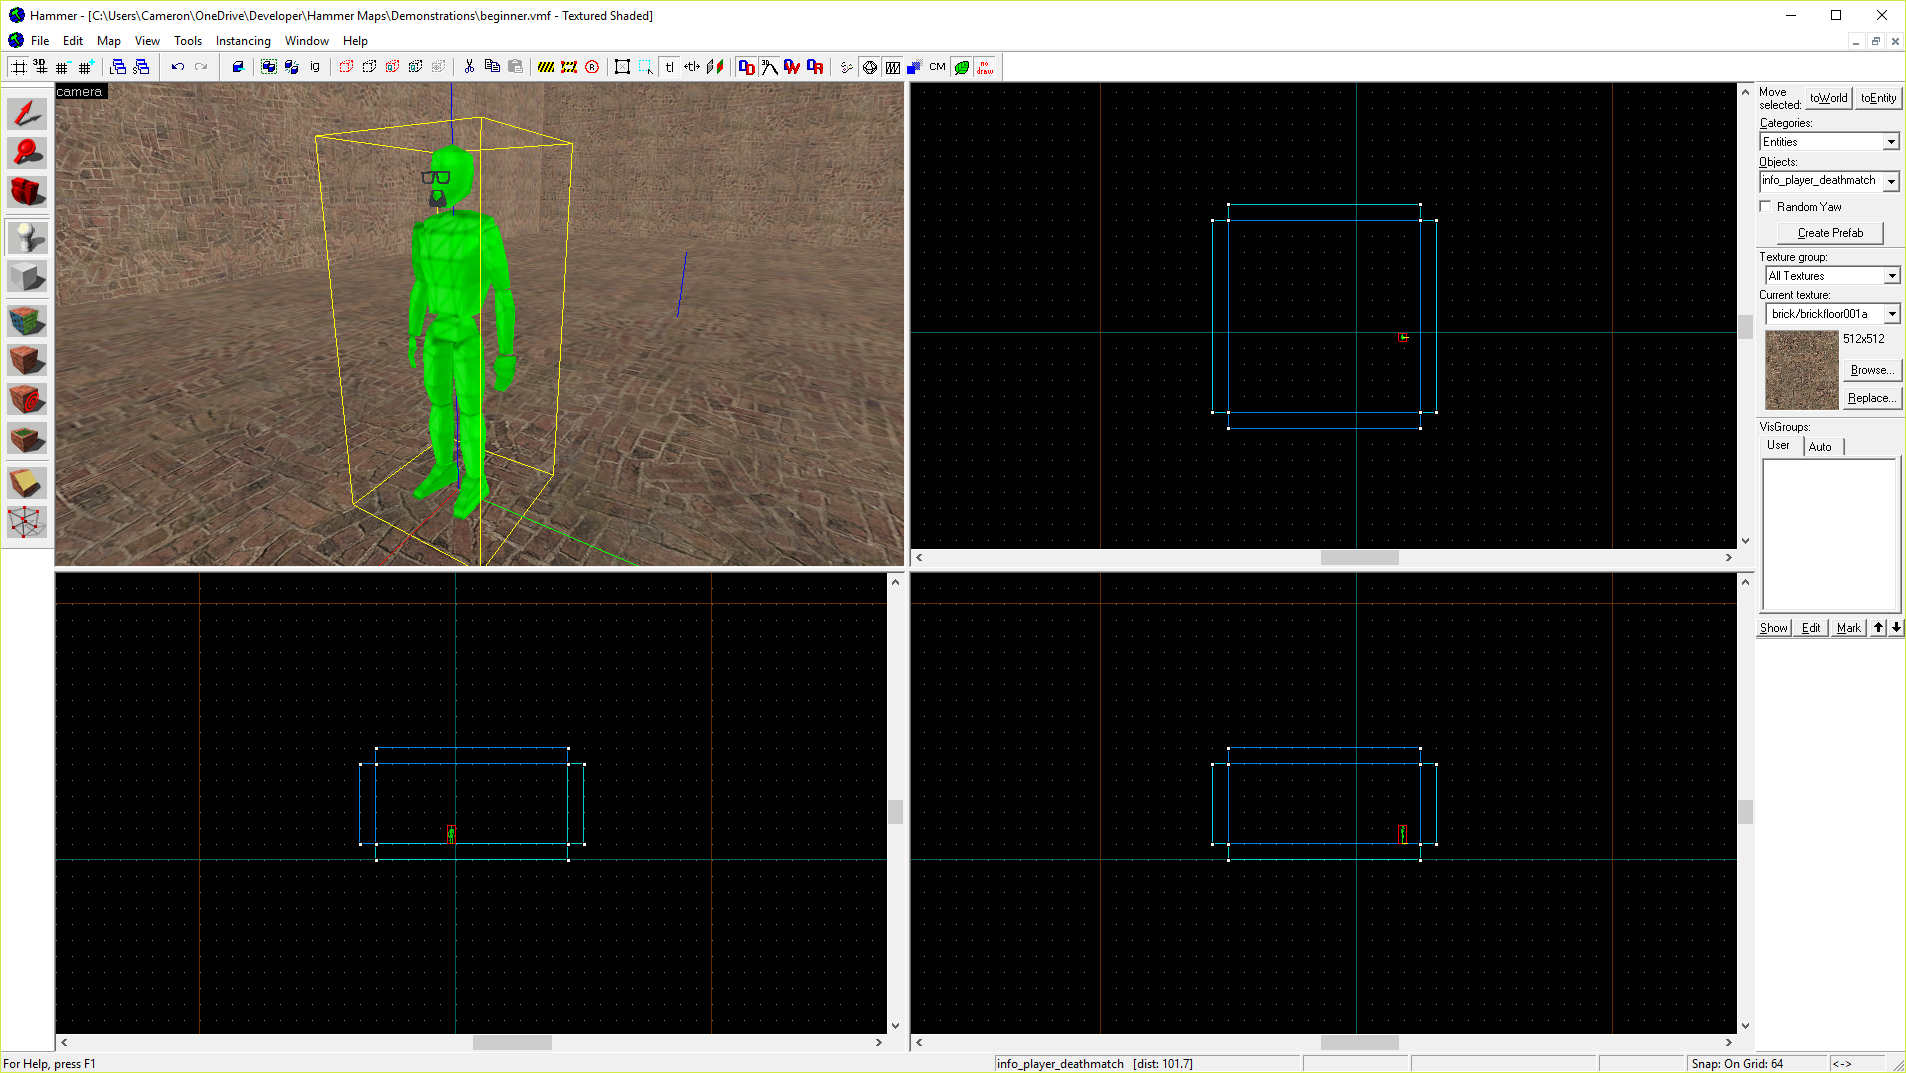
info_player_start
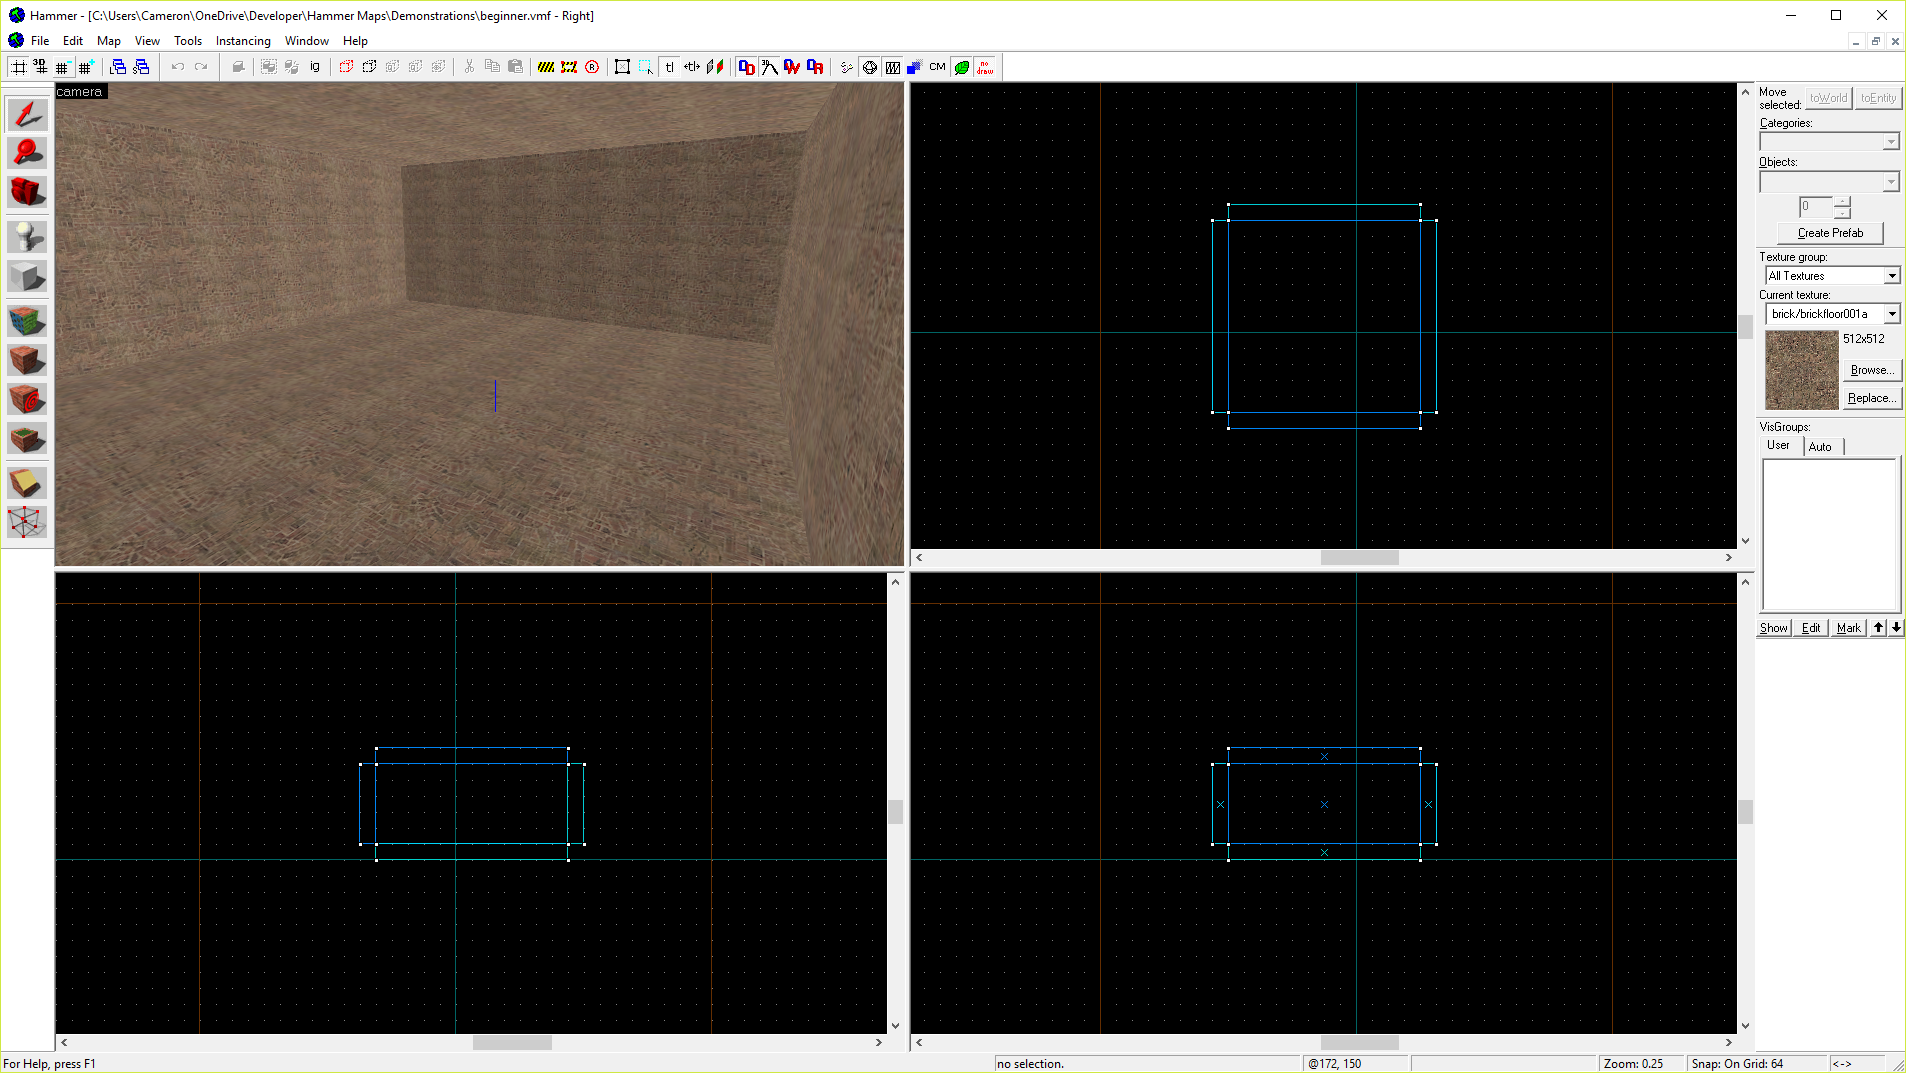
You can also place entities in any of the 2D viewports by clicking on a spot on the grid. A green "crosshair" will appear, showing the exact location where your entity will spawn. You can adjust it by clicking around in any of the other 2D viewports. Pressing your Enter key will spawn your entity.
Entity settings through keyvalues and spawnflags
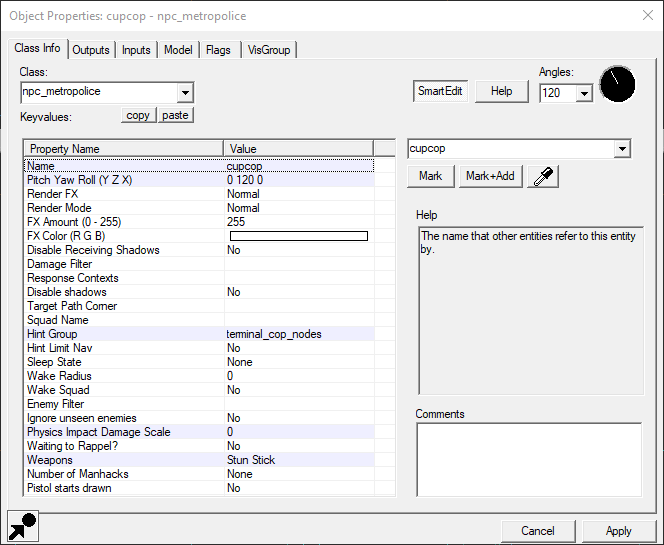
Many entities have settings you can modify. Settings come in the forms of and spawnflags. To access an entity's settings, double click it in the 3D viewport. The Object Properties window will appear. Alternatively, you can right-click the entity in one of the 2D viewports and select "Properties".
An entity's keyvalues are generally used to modify their main attributes. Names, parents, and rotation in the world are common ones. Light entities have keyvalues for specifying falloff and brightness. Props have their model name specified through a keyvalue. Metropolice and Resistance members can have their squad set through their keyvalues. Unfortunately, player spawns don't have much in the way of keyvalues to set. As a better example, here are the keyvalues of the infamous "pick up that can" Metropolice NPC from the beginning of Half-Life 2:
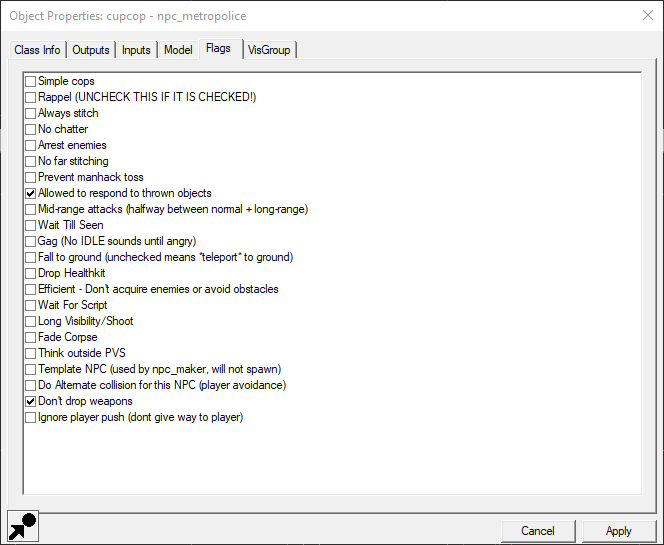
Switch over to the "Flags" tab of the Object Properties window. This is where entities have their spawnflags set. Spawnflags are a set of more rudimentary controls over an entity, usually used to disable certain parts of that entity's functionality. If a citizen shouldn't be commandable by Gordon in-game, you can disable that through its spawnflags. Lights will spawn off if their "Initially dark" keyvalue is set. Following with the previous example, here are the spawnflags for the can cop:
Light entities and shift-dragging
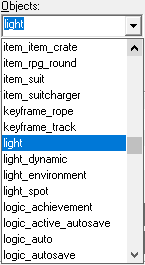
For practice, let's place a few more entities. To change the object to be spawned, turn back to the New Objects toolbar and select the Objects dropdown. A big list of entities will display; go looking for a light entity.
Go to the overhead 2D viewport and click in the grid somewhere towards the middle of the box. Use the other viewports to put it over the player's head. When you press your Enter key, instead of a green player spawning, a small lightbulb will spawn instead. This is a light entity, a simple light that'll appear to come from nowhere. The VRAD compile tool will find the locations of all lights in a map and compile their effects into lightmaps, which you don't need to worry about. Essentially, light entities make light.

What if we wanted multiple lights, though? You could place them all like you did this one, or you can simply copy the light. Hammer includes a handy function for copying large batches of selected items in a snap. To demonstrate on this light, switch to the Select tool, zoom into the grid, and drag the light around. Notice how it only moves the light. Now try dragging the light again, but this time, holding down your Shift key while you do it.
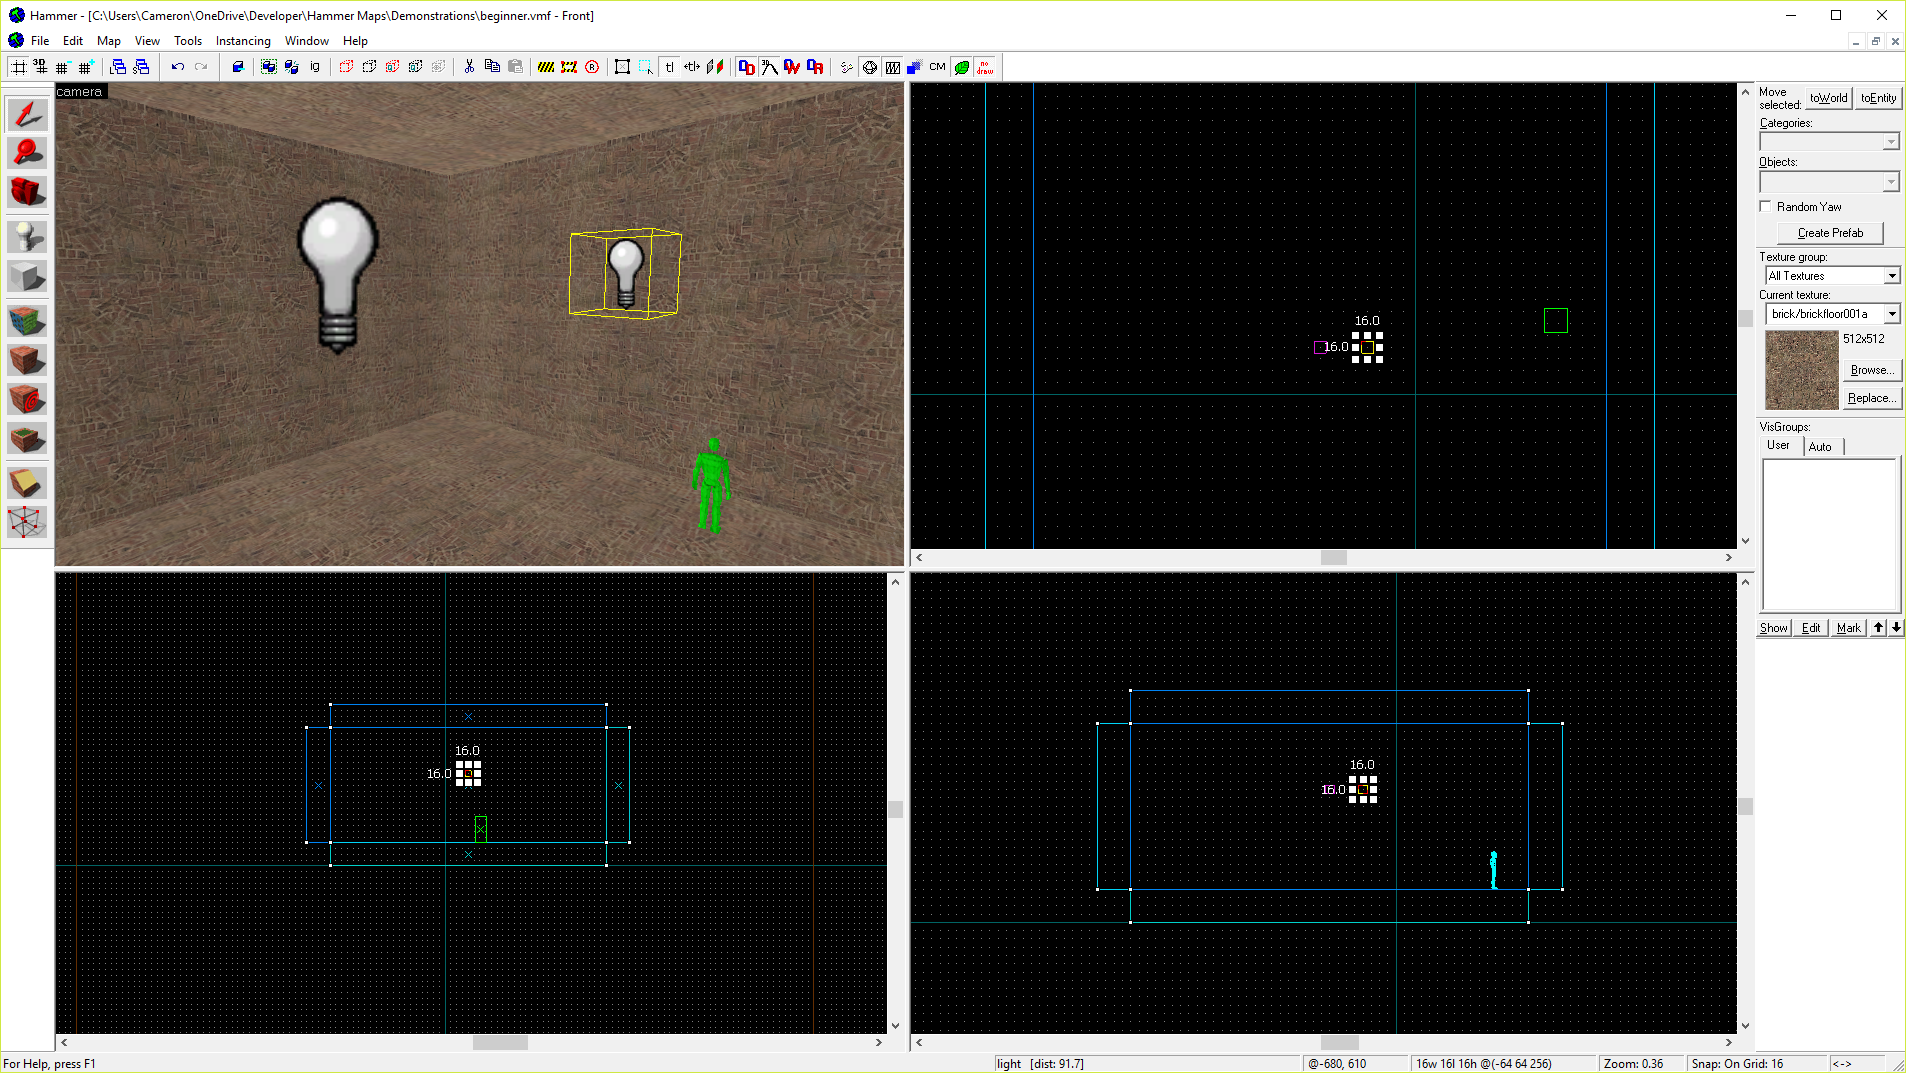
The light's been copied. If you set any custom properties or a name for the light, it'll have been copied with it. You can select entire batches of entities and brushes together and shift-drag them around in the grid to copy them.
Prop entities
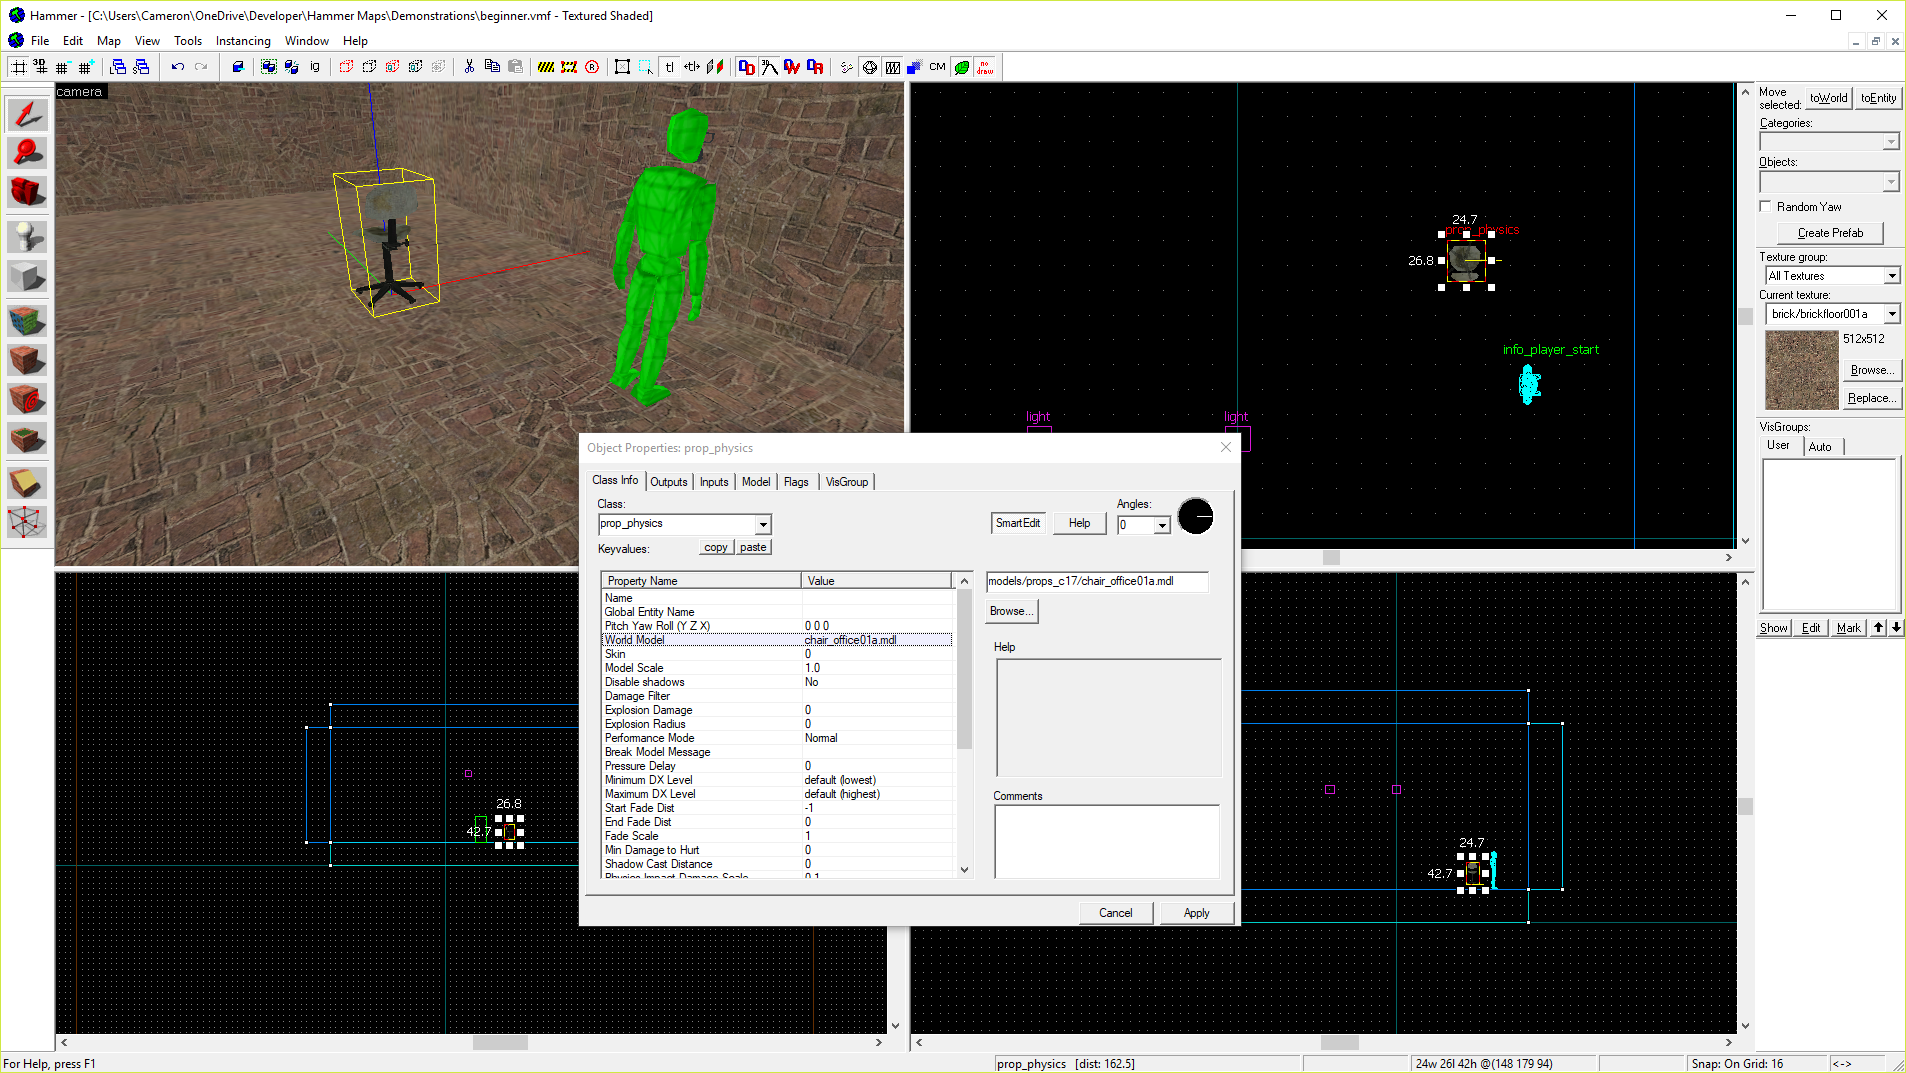
Let's place one more entity. Go back into your New Objects toolbar and select a prop_physics. Simply put, a physics prop is an entity that obeys the laws of physics, such as gravity. Place this one on the ground next to your player spawn. It'll spawn as a small, red box, but that's because we haven't given it a model to use.
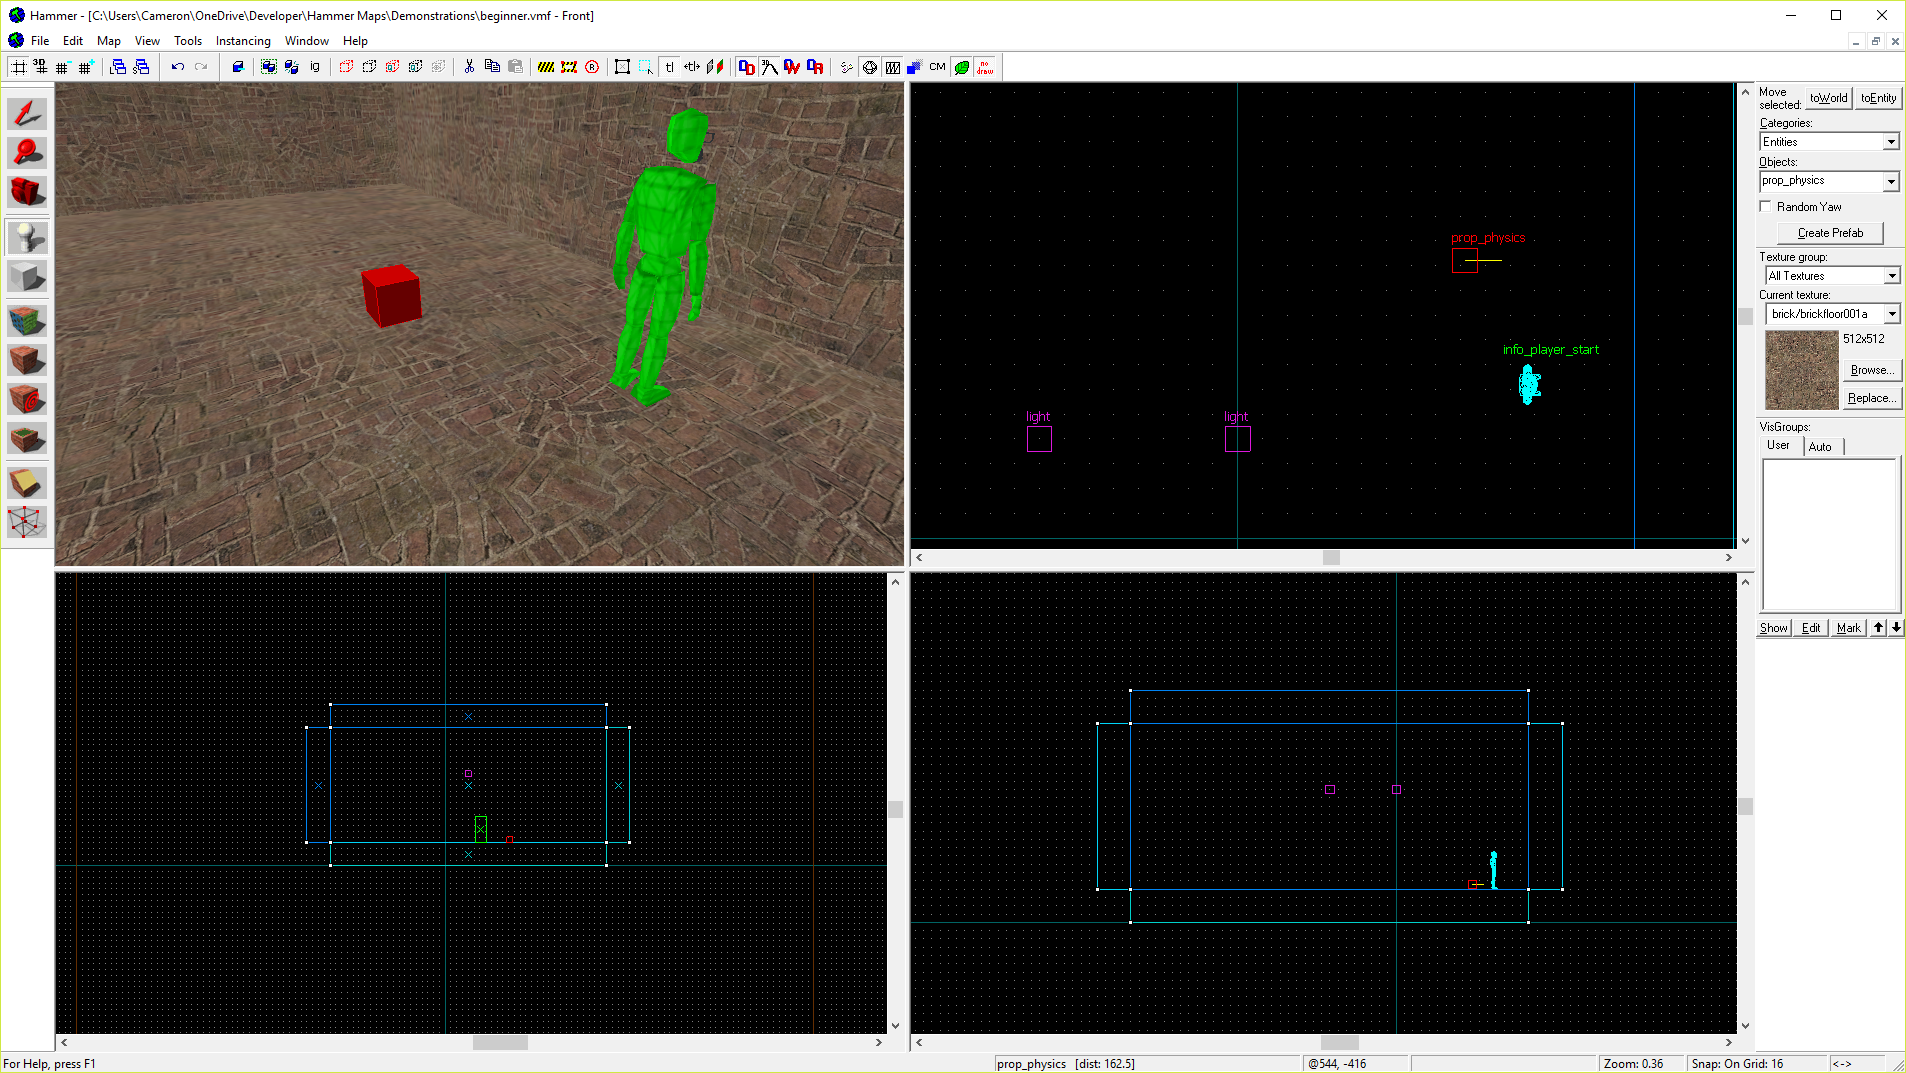
Pull up the prop's Object Properties and look for the "World Model" keyvalue. This sets the model the prop will use. Click the "Browse..." button to pull up the Model Browser. The Model Browser will list all the models and folders of models available to the game you're mapping for. For now, use the "Filter" box to look for props_c17/chair_office01a.mdl, which looks like a stained office chair.
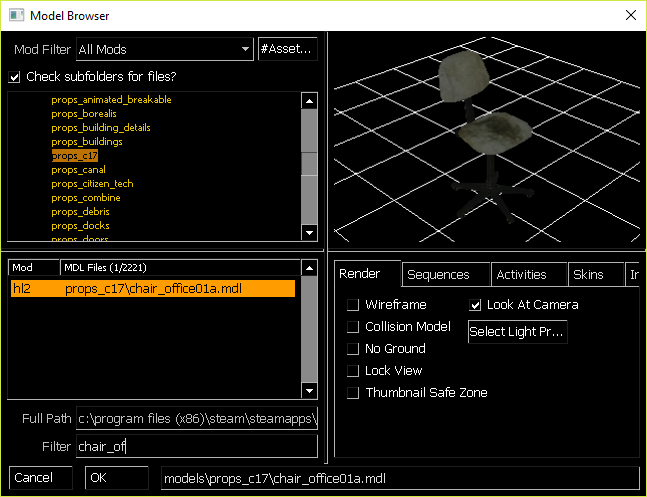
Press OK on the browser and Apply on the Object Properties window, and the chair will have been made.
Creating brush entities
One final topic concerns the makings of brush entities. Switch back to your trusty Block tool and create a brush somewhere in the box. Switch to the Select tool, select the brush you've made, and press Ctrl+T. This ties the brush to an entity, making it function as part of that entity.
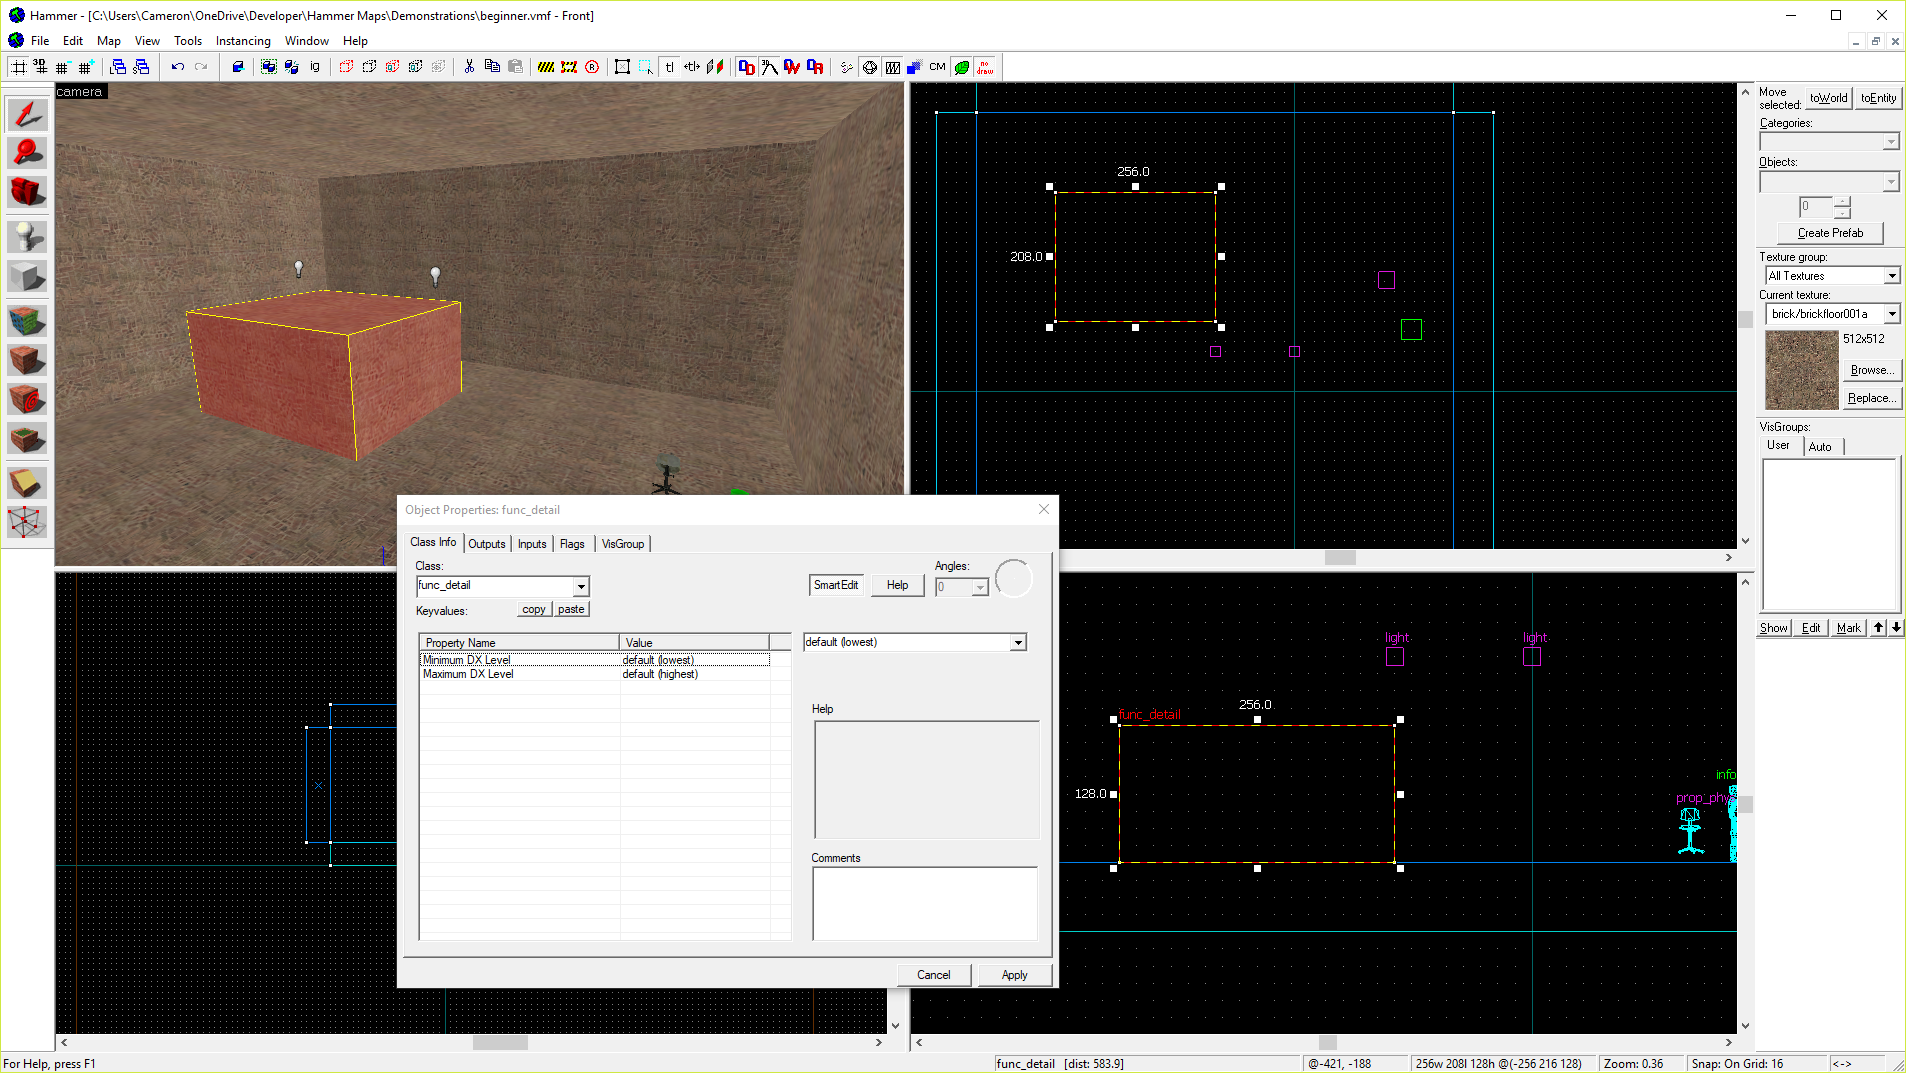
func_detail brushThat was a lot to take in, but it'll become second nature in time. If you're curious as to what a certain entity does, consult the Valve Developer Community and its wealth of documentation.