
Making Better Use of the Carve Tool
(December 10, 2017)
If you ask long-time users of Worldcraft and Hammer about the Carve tool, more than likely, they'll joke about it, or outright insist it has no business actually being used in a map. The reason why is simple; oftentimes, a bad subtraction will cause BSP errors or an unmanageable mess of brushes split at all sorts of strange angles.

The Carve tool doesn't have to be so messy, but its use has to be carefully thought out. The convenience of being able to draw a door and use it to cut a doorway will catch up with you if you don't use it properly.
What is the Carve tool?
The Carve tool uses the currently selected brush to split apart any brushes it may intersect. This will leave a hole shaped like the brush used in the subtraction. This is helpful for windows and doorways, where you can draw out the door using brushes and use it to carve a doorway into a wall, instead of constructing the wall around the doorway manually.
For squares and rectangles, its use is rarely an issue. For brushes with more angles, angles that don't happen to be right angles, or other primitives altogether, it can make an absolute mess out of your brushwork.
Minimizing the damage done
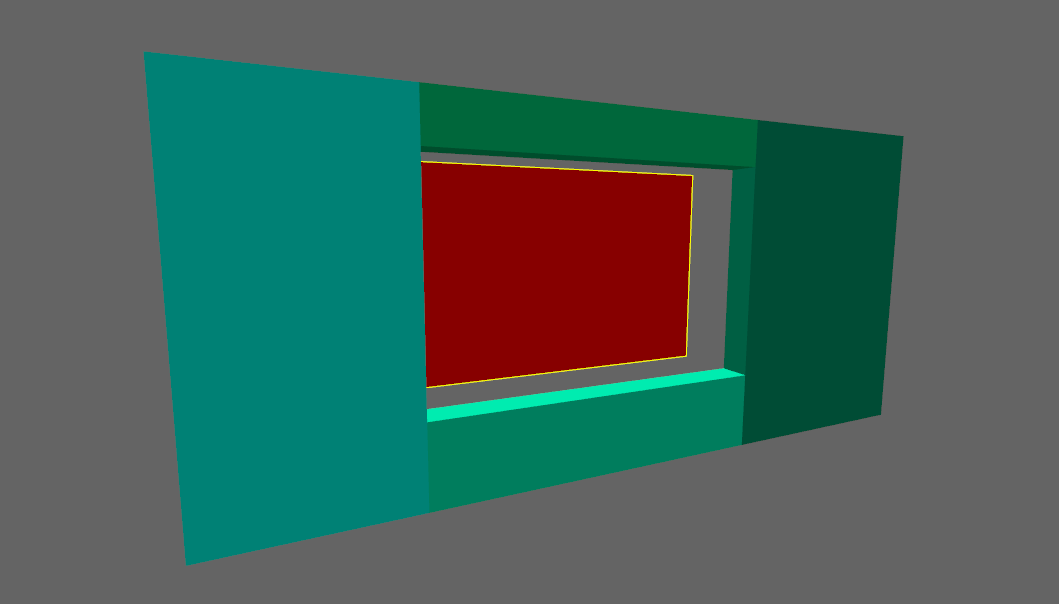
The solution is to minimize the area you actually carve, producing the same-shaped hole, but affecting only as much of the wall as needed. In the following picture, the same cylinder has been carved into two halves of the same wall, but we clipped out a square for the one on the right so as to not affect the rest of the wall. Thus, we get an identical hole in-game that's far more manageable if we needed to stretch or manipulate the wall itself.

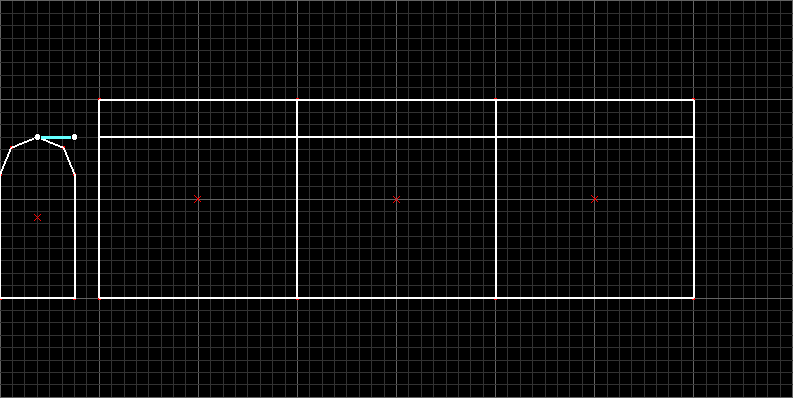
Take our second example, a set of three doors that will take the form of arches when we're done. If we simply carved with three different doors, we'd get something akin to this:

Not the worst carving job in the world, but imagine if we wanted to make the wall taller. Where would you start? It'd be a lot of vertex editing, when the cleaner alternative is to prevent it from affecting the top of the wall at all.
To start, separate the wall into thirds.

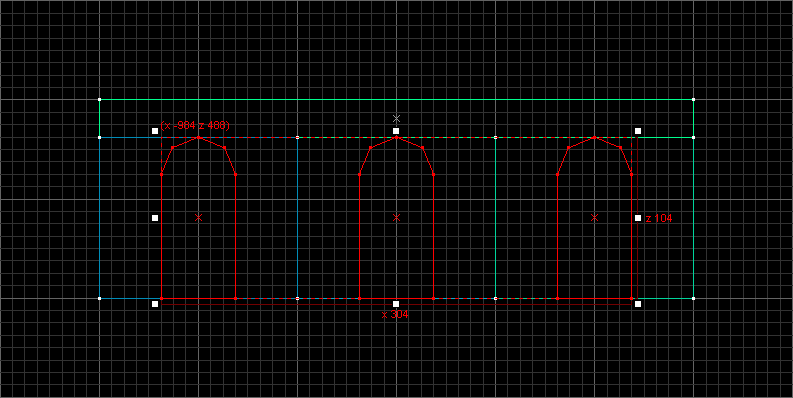
Clip the top of the wall, using the apex of the door as a guide on where to clip it. The wall will now be split into six brushes, though we'll delete two of the top ones and stretch it out to make it four.
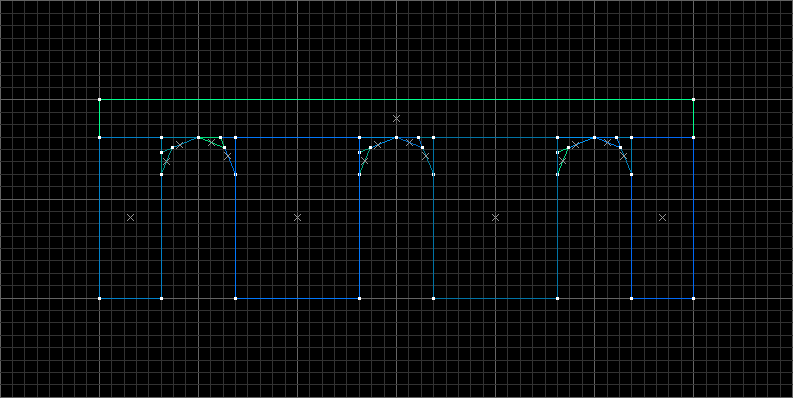
Next, we'll copy the door shape to each brush, fitting square in the middle of each. We'll carve them by selecting all three, going to the Tools menu, and selecting "Carve".
We now have a clean set of three archways. If we wanted to make the wall wider or taller on any side, we would be free to do so.

As someone long ago described it, carving is much like surgery. You have to plan things out carefully if you don't want to leave your level in worse shape than before you started.