
Zipping Files Into a Map Using BSPZIP or VIDE
(November 8, 2017)
If you're making a map with a lot of custom assets, when it comes time to send it out, installing it becomes quite the hassle. Textures go in one folder, sounds in another, models in another, with the BSP itself going into the maps folder, separate from the parts that make it up. For an end user or a server owner looking for custom maps, having lots of extra stuff to download can mean skipping over your map entirely.
Thankfully, the BSP file format allows for custom textures, models, and sounds to be embedded (herein referred to as zipping) right into the file. When the map gets run, the files are loaded from inside the map itself, regardless of how the player has it set up. If they have the BSP, all your custom assets will be there.
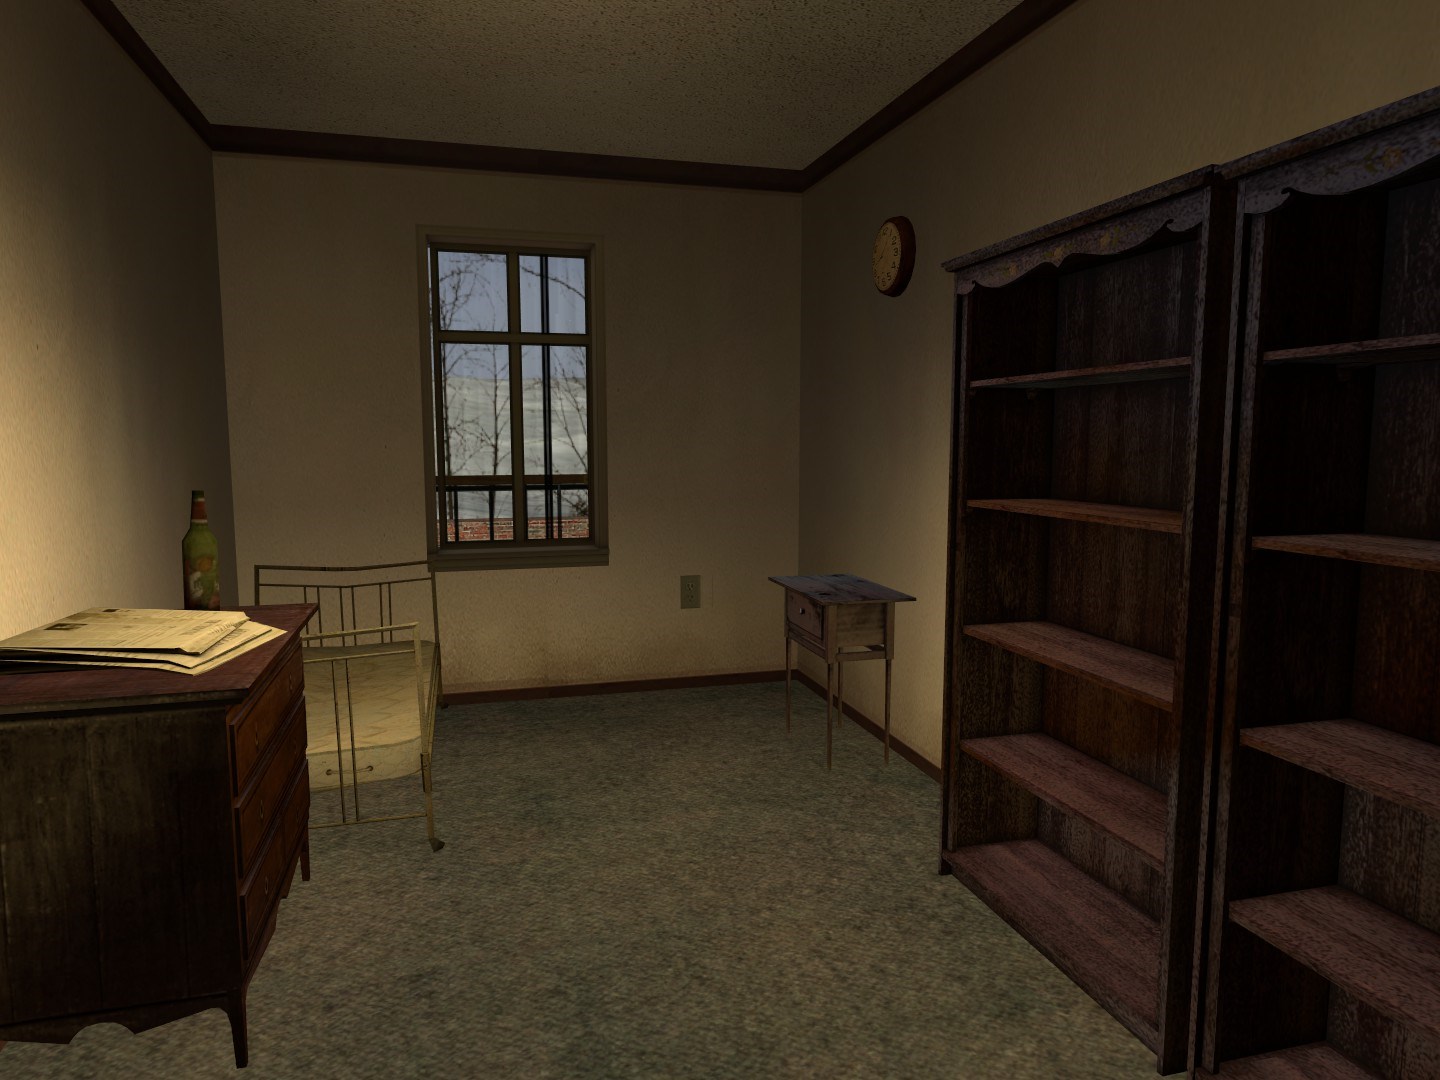
Right: The wall and floor textures are present, despite not being in the game files

When should I zip my files?
You should zip your files if you're using a custom textures or models in a single map, or if you need the BSP to be self-contained (say, for a server download). If you have a series of maps that all share assets, on the other hand, zipping the same textures into each one would rapidly become inefficient and bloat each BSP. It's up to you to decide which is the better of the two choices.

BSPZIP: The command-line way to zip files
The tool Valve gives you to zip files is called BSPZIP, fittingly enough. It's a command-line tool that can manipulate the textures and models embedded in a BSP, often through the use of file lists. For the purposes of this tutorial, we'll be embedding a single model and its materials into dm_lockdown, a map from Half-Life 2: Deathmatch.
Your first step will be to write one of those file lists. You'll need some form of a text editor; Notepad will work fine if you don't have anything better.
A file list is a list of paths, two for each file to be zipped.
- One path refers to the internal path of the file, or where it'll go in the BSP. Internal paths are relative and look a lot like what you'd put for a
$basetextureif you were writing a custom material file. An example of an internal path would bematerials/custom_vtf/tile/bathroom_tile02.vmt. - The other path refers to the external path of the file, where it actually exists on your hard drive. An example of an external path would be
C:\Users\Administrator\Developer\custom_vtf\tile\bathroom_tile02.vmt.
Each path should be on its own line, internal paths before external ones. Thus, the file list should generally be in this order:
internal\path\01.vmt
C:\external\path\01.vmt
internal\path\01.vtf
C:\external\path\01.vtf
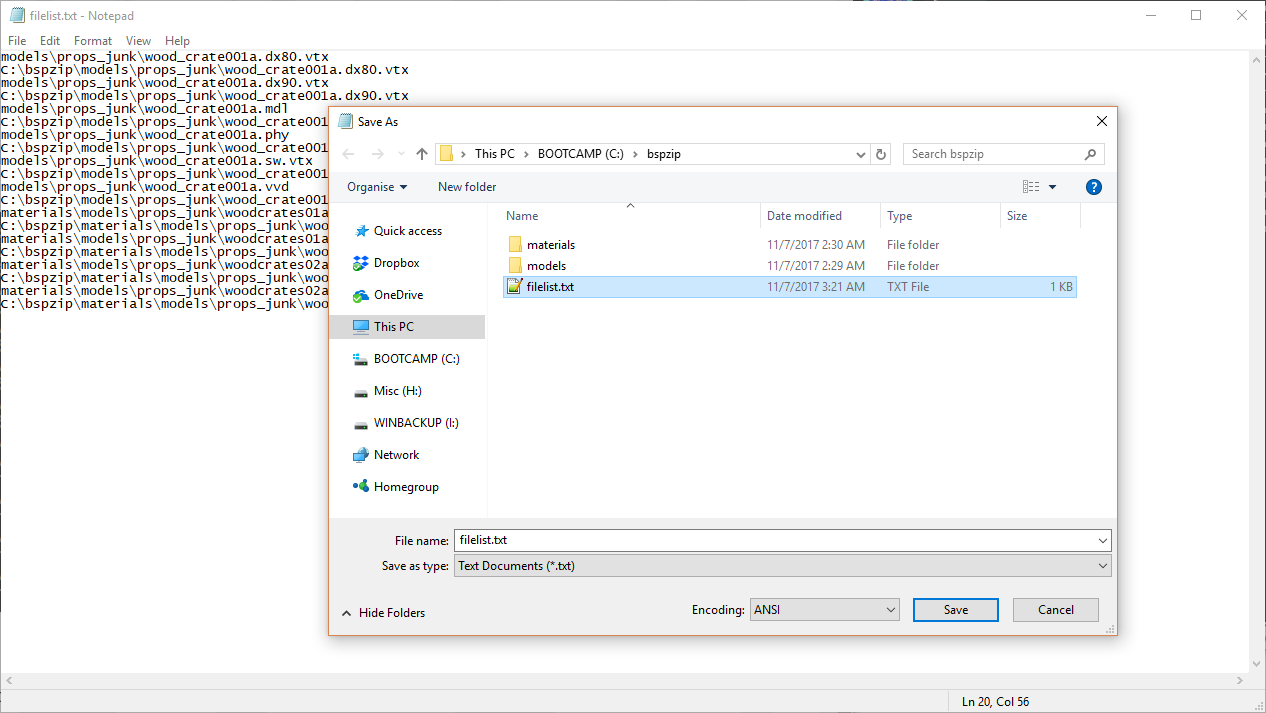
For our dm_lockdown test map, our file list looked like this:
models\props_junk\wood_crate001a.dx80.vtx
C:\bspzip\models\props_junk\wood_crate001a.dx80.vtx
models\props_junk\wood_crate001a.dx90.vtx
C:\bspzip\models\props_junk\wood_crate001a.dx90.vtx
models\props_junk\wood_crate001a.mdl
C:\bspzip\models\props_junk\wood_crate001a.mdl
models\props_junk\wood_crate001a.phy
C:\bspzip\models\props_junk\wood_crate001a.phy
models\props_junk\wood_crate001a.sw.vtx
C:\bspzip\models\props_junk\wood_crate001a.sw.vtx
models\props_junk\wood_crate001a.vvd
C:\bspzip\models\props_junk\wood_crate001a.vvd
materials\models\props_junk\woodcrates01a.vmt
C:\bspzip\materials\models\props_junk\woodcrates01a.vmt
materials\models\props_junk\woodcrates01a.vtf
C:\bspzip\materials\models\props_junk\woodcrates01a.vtf
materials\models\props_junk\woodcrates02a.vmt
C:\bspzip\materials\models\props_junk\woodcrates02a.vmt
materials\models\props_junk\woodcrates02a.vtf
C:\bspzip\materials\models\props_junk\woodcrates02a.vtf
Once that's written, save it anywhere you want. The file should have a .txt extension.
Your next task would be to find the location of the BSPZIP executable included with the game you're mapping for. It should be in the same bin directory as Hammer or any of the other SDK tools. For Half-Life 2: Deathmatch, BSPZIP is located in C:\Program Files (x86)\Steam\steamapps\common\Half-Life 2 Deathmatch\bin.
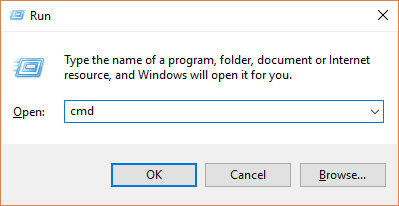
Open up a new Command Prompt window. The easiest way to do this is to go to your "Run..." menu, either through the Start Menu or by pressing Win+R. In the dialog box that appears, type cmd and press Enter. A Command Prompt will appear.
Navigate to the directory where BSPZIP is located using the cd command. In our case:
C:\>cd C:\Program Files (x86)\Steam\steamapps\common\Half-Life 2 Deathmatch\bin
BSPZIP can run in a variety of modes. Since we want to zip this model into our map using a file list, we'll use the -addlist mode. Thus, the command format you'll want to us is bspzip -addlist . This is the command we used:
bspzip -addlist ../hl2mp/maps/dm_lockdown.bsp C:\bspzip\filelist.txt ../hl2mp/maps/dm_lockdown.bsp
To wit:
- BSPZIP
- In its -addlist mode
- Goes up a directory (that's what the
..is for), intohl2mp, intomaps, and finds dm_lockdown.bsp for the input BSP - It finds filelist.txt in
C:\bspzipfor the file list - And saves over the original map in the same location.
C:\Program Files (x86)\Steam\steamapps\common\Half-Life 2 Deathmatch\bin>bspzip -addlist
../hl2mp/maps/dm_lockdown.bsp C:\bspzip\filelist.txt ../hl2mp/maps/dm_lockdown.bsp

Valve Software - bspzip.exe (Jun 14 2017)
Warning: falling back to auto detection of vproject directory.
Opening bsp file: C:\[...]\hl2mp\maps\dm_lockdown.bsp
Reading unknown lump #32 (3720 bytes)
Reading unknown lump #49 (1143463 bytes)
Adding file: C:\bspzip\models\props_junk\wood_crate001a.dx80.vtx
Adding file: C:\bspzip\models\props_junk\wood_crate001a.dx90.vtx
Adding file: C:\bspzip\models\props_junk\wood_crate001a.mdl
Adding file: C:\bspzip\models\props_junk\wood_crate001a.phy
Adding file: C:\bspzip\models\props_junk\wood_crate001a.sw.vtx
Adding file: C:\bspzip\models\props_junk\wood_crate001a.vvd
Adding file: C:\bspzip\materials\models\props_junk\woodcrates01a.vmt
Adding file: C:\bspzip\materials\models\props_junk\woodcrates01a.vtf
Adding file: C:\bspzip\materials\models\props_junk\woodcrates02a.vmt
Adding file: C:\bspzip\materials\models\props_junk\woodcrates02a.vtf
Writing new bsp file: C:\[...]\hl2mp\maps\dm_lockdown.bsp
Writing unknown lump #32 (3720 bytes)
Writing unknown lump #49 (1143463 bytes)

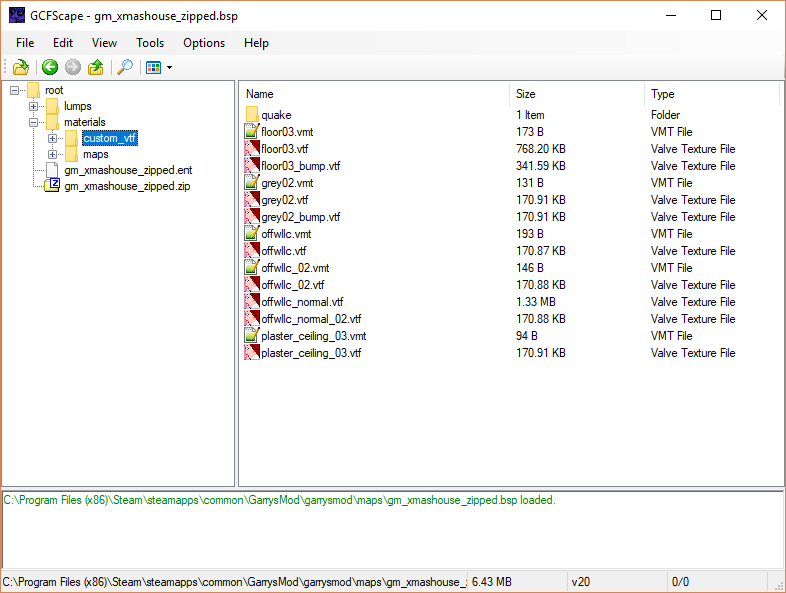
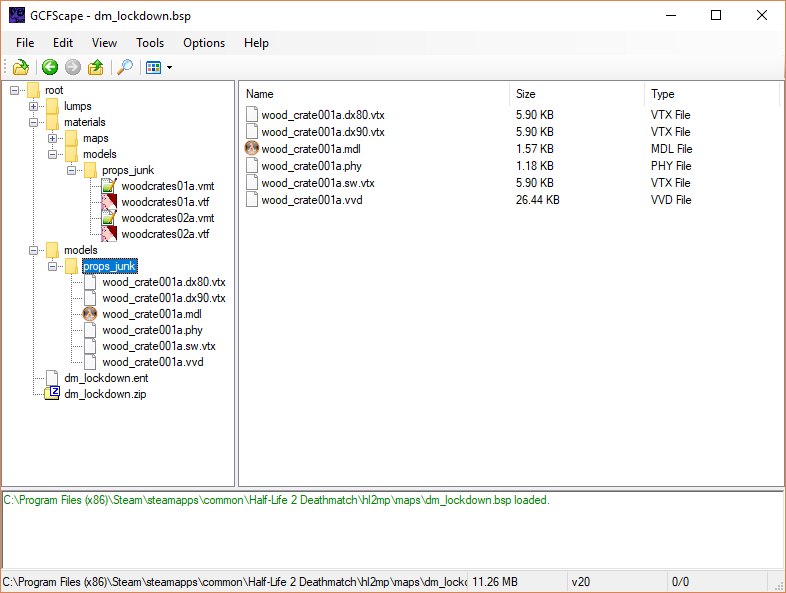
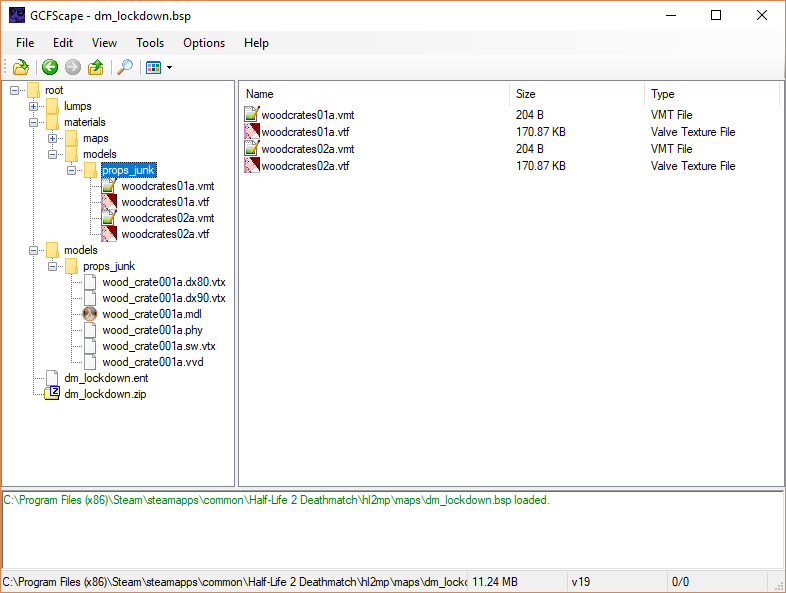
If we were to open dm_lockdown.bsp up in an archive viewer such as GCFscape, we'd see that the crate model and its two skins have been zipped into the map. When it's run, even if the crate model isn't available in the game files, it'll be loaded through the BSP itself.
VIDE: The graphical way to zip files
Writing a file list can be a long-winded and tedious process, not to mention a little confusing. Community members have written tools that either automate the process or provide graphical interfaces to zipping files. The one we'll take a look at is called VIDE, or the Valve Integrated Developer Environment. There's a lot more to VIDE than simply zipping files, but it's a newer program and it has no dependencies, unlike some popular alternatives such as Pakrat. You can download VIDE at the official site or using our mirror.
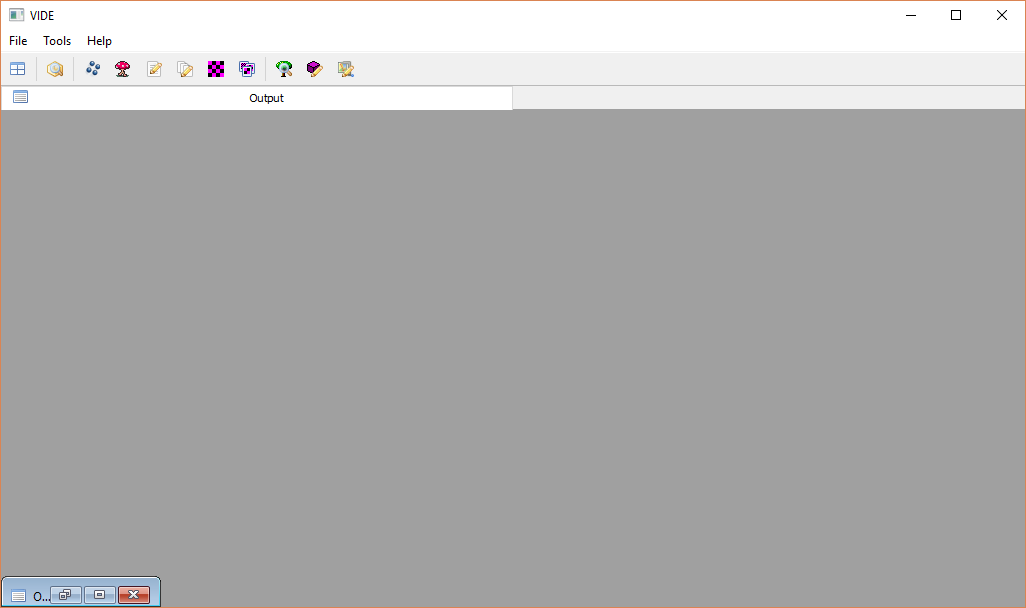

Unzip VIDE to any folder and run VIDE.exe. A window will pop up with a toolbar of buttons along the top, each pertaining to a different tool.
The part of VIDE that we're interested in is the pakfile editor, which is the icon on the very end. Click it, and in the window that pops up, click the Open button under the "BSP Options" header. This will bring up a file select dialog. Navigate to your map and open it. A list of green files should appear, assuming you've built cubemaps.
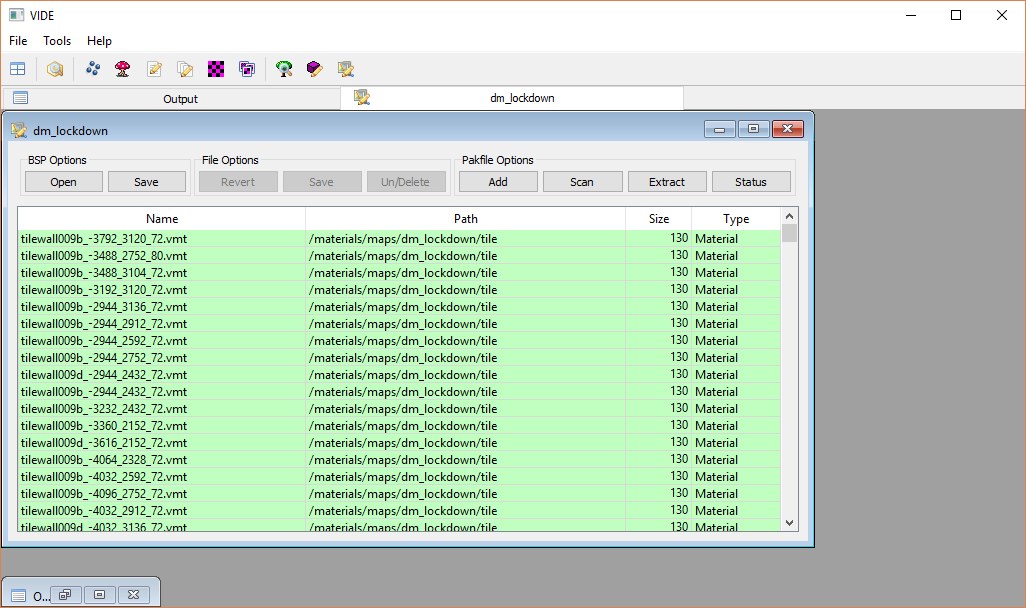
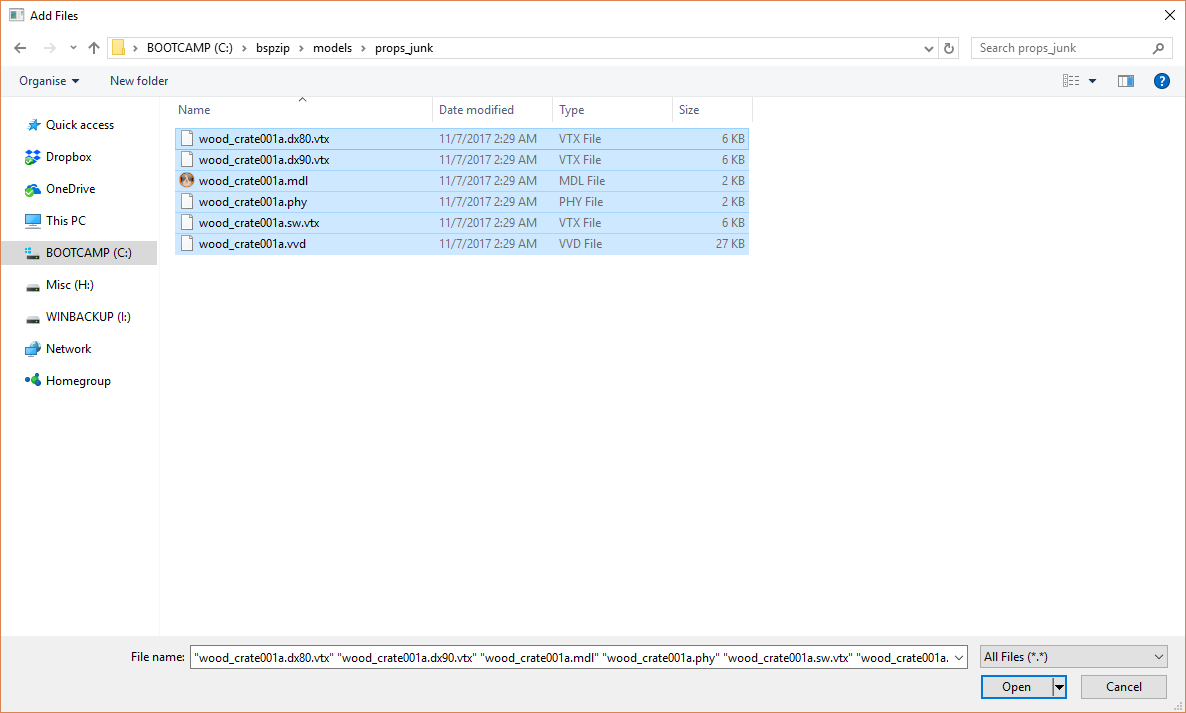
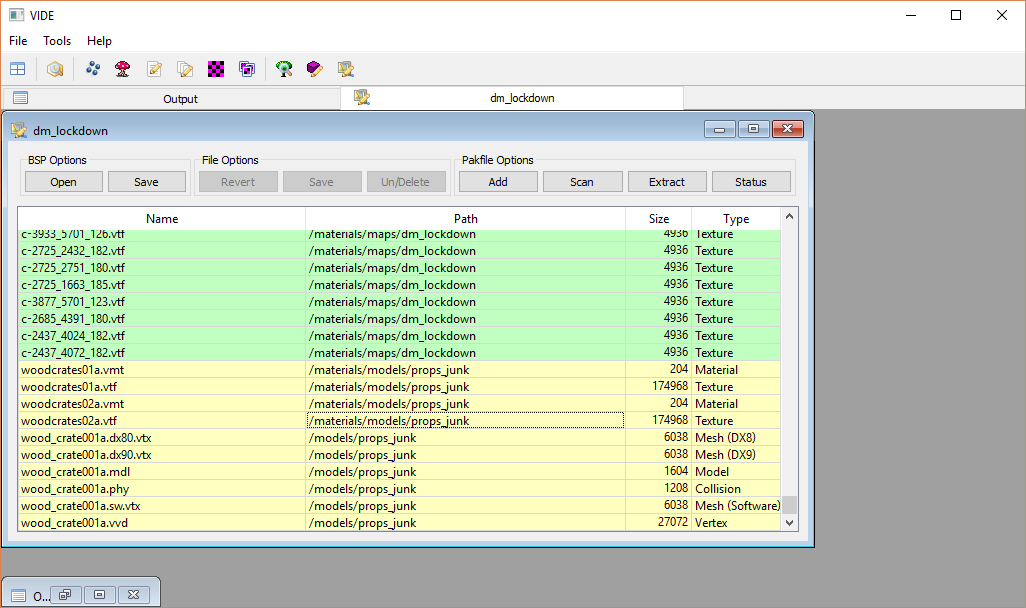
dm_lockdown when opened with VIDETo zip files, click the Add button underneath the "Pakfile Options" header. Another file dialog will appear. Navigate to your files and select all the ones you'd like to zip. For instance, because all of the files for the model of the crate are in the models/props_junk folder, we can select them all at once, and they'll get zipped in the same place.
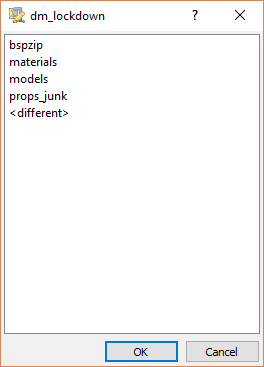
A strange window will appear next. You'll see a list of folders with "bspzip" at the top and "<different>" at the bottom. Ignore this window and click OK; if you select any of the things in the list, VIDE will try to pack it into the wrong place.
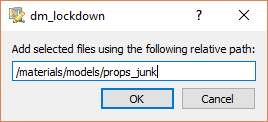
You'll see a small dialog box with a text entry field. This is where you'll set the internal path of your files, or where they'll reside in the BSP. An example of an internal path would be materials/custom_vtf/tile.
If you've set your internal path correctly, you should see a few yellow files at the bottom of the list. Their paths should look pretty similar to the paths of the cubemaps already in your map. Repeat this process for any other folders of materials you'll need in your map, and when you're done, click the Save button next to the Open button. The yellow files will turn green, indicating they've been packed into the map.
If we open the BSP up in an archive viewer like GCFscape, we'll see that the crate model and its two skins have been packed into the map. If it's not present in the game files when the map is run, it'll be loaded from the BSP itself.
It's a good idea to test your map on a copy of the game that doesn't have all of your custom materials loaded into it. Send the map to a friend for testing to make sure you've packed everything correctly.
The ability to store assets in the BSP itself is extremely handy. Whichever tool you use, you can be confident that your map will look the way it should, regardless of how it's installed.